Friday, October 28, 2011

Here I Stand

We have been playing Here I Stand by GMT Games.

http://www.gmtgames.com/p-248-here-i-stand.aspx

This is a thoroughly amazing multiplayer board game for first half of the 16th century. The history is amazing. The game-play is fairly easy, but the subtle roll of diplomacy and card play really make this game click!


We have six gamers playing next week. Our first full session was won by Brian Connolly (auto win for capturing enough keys) for the Hapsburgs!

I've been playing the Papacy, which has an entirely different set of victory conditions. I'm mainly focused on the Italian boot and burning heretics. Turning back the tide of Reformation!

Friday, September 16, 2011

Din of Battle 2nd Edition Available to Purchase!

Well, I'm extremely excited that my wargaming rules are officially available to be purchased.

Link to the Piquet site:

http://www.piquet.com/store/index.php?main_page=product_info&cPath=2&products_id=29


Cheers!
Eric

Monday, September 5, 2011

Klash in the Kashmir - World at War Scenarios

Hi folks,

Although, I love playing with miniatures, I cut my teeth on board games. I have recently, within the last year, fell in love with a series of games from Lock 'n' Load Publishing called World at War. I have all the products in the series, and I'm constantly looking for new ground in the series.

A good fellow named Sava, has made some add on counters for the game covering Indian and Pakistan troops from the mid-80s. I have taken his counters and have started to make some scenarios with them.

Klash in the Kashmir is my title for the set of scenarios I'm currently working on. The first of five scenarios in the set is called "Kashmir on Fire", which is the first strike moves made by the Indian army against the Pakistanis. Some of the later scenarios will see some unusual twists in the game.

The first playtest went well and wanted to share some of the photos with you.

Indian 78th Mechanized must move from the left side of the map all the way to the opposite edge. I'm using two maps (3 & 5) from the Line of Fire magazines. They have ten turns to get off the opposite edge.


Pakistanis must deploy in depth, garrisoning the two towns on the map (one on each map) and have a patrol near the final exit point.


Indians start with the initiative and drop HE rounds on the closest town and soften up the enemy, knocking out a Pakistani M113. Pakistani infantry scatter for cover!


Pakistanit HQ is running for the second line of defense. (in the center of the picture below with an Ops complete marker on him)


Turn 2 sees the Indians attempting to bybass the first town, knowning that follow-up units will mop up the remaining Pakistanis. One BMP-1 is distrupted by long range fire from the Pakistani M-901 ATGM.


Turn 3 sees most of the Indians bypass the town, but two platoons of BMP-1 loaded with infantry start fighting it out at close range with the Pakistanis. One Pakistani infantry platoon is distrupted.


M-901 can be seen at the top of the hill with an Opps Complete marker on him.


Turn 4 ends without either side moving. Turn five sees the Indians around the 1st town getting pinned down, while the rest of the command pushes on, taking pot-shots as they move.


Close up of Turn 5 around the second town. M-901 has been disrupted and the Indian 78th HQ is leading from the front to get better line of sight to the targets.


Turn 6: Indian 78th goes first and drops HE on the closest infantry unit which disrupts the unit. Then they drop smoke on the same location (see below). They then sprint around the mess, hoping to put some distance between them and the enemy.


Meanwhile the Indian infantry has dismounted, but took casualties. Both BMP and infantry are now disrupted by the spirited Pakistani defense.


Turn 7: Pakistanis drop HE directly in the bunched up BMPs of the 78th Mech!! This completely changes the complextion of the battle. Two of the four remaining BMP platoons are distrupted.


Pakistanis come out from the smoke and assault the rear of the Indian APC column destroying the BMP1 and their riders!


Another Pakistani infantry unit attempts to move forward only to be pinned down by the HQ and his attached BMP platoon. The M-901 shreds another BMP (wreck marker).


Turn 9: Indian infantry dismount and assault the M-901 destroying it, and driving back a platoon of M113, but their objective is too far and nearly all the Indian units have been shattered.


For my first scenario, this went pretty well. I think 10 turns is about right, but the Indians need to push harder as there is very little that can stop them at a distance except the M-901. Feedback welcome!

Sunday, August 28, 2011

Heavy Seas - Letter of Marque

Ahoy mates!

Stumbled upon this delicious Belgium style Dubbel from Heavy Seas brewery. Not only is it a wonderful beer, it is reasonabily priced ($5.99 for 22 oz), and has the added coolness factor of a great name and whallop (8%ABV).

I found this at Total Wine, and since this is a season or limited edition beer I'm going to have to go back and stock up on the beer this week.

Check out the wicked label from their website:


Here is the Heavy Seas website:
http://www.hsbeer.com/letter-marque

Drink well!
Eric

Wednesday, August 17, 2011

Pacific War - Samurai Dawn Battle Report

Played this game several years ago. This was pretty interesting in that the battle began hours before dawn and started with a Japanese attack on the American positions. Once again this was fought using modified POA: Blitzkreig from Piquet Inc. Each unit is a squad or individual vehicle.

USMC Objectives

In the pre-dawn hours maneuver your forces to take the town. Inflict heavy casualties on the enemy. Secure the North road to prevent Japanese reinforcements from arriving. The caves in and around the gorge must be cleared. They provide too many areas for Japanese to stash weapons and equipment. Also, if you can find it, destroy the 88mm AA gun the Japanese have hidden in the area. It has been a thorn in the side of Marine Corp Aviation for weeks. Lastly the town must be secured at all costs. You have a large force of infantry, armor, and support for this task. Use them wisely.

USMC Victory Points:
Each VP Area = 5 points
Each Japanese Infantry squad destroyed or routed = 2 points
Each MG, Mortar destroyed or routed = 1 point
Each Gun destroyed = 2 points
Each tank destroyed = 4 VPs

Special Rules
The battle starts before day light hours. There are two turns of night (visibility only 4”). US units move at half speed and vehicles may not move unless on roads. No air, off-board, or indirect artillery may be fired at this time. Japanese foot units move at full speed and vehicles may only move on roads at half speed. The 3rd and 4th turns are dawn and have 8” visibility. All units function as normal, including off-board assets.

Japanese Objectives
Launch devastating Banzai attack in the pre-dawn hours. You must commit 6 infantry units (2nd and 3rd Platoons) to this attack. You will receive an automatic 3D6 amount of impetus to launch this attack. Destroy as many US units as possible, while maintaining control of the town. Keeping the North road open may allow you to receive additional reinforcements. Do not lose the 88mm AA gun as it is critical to air superiority in the area. Losing the AA gun will allow the USMC to have unrestricted air support. You may place the 88 on the board when you fire it for the first time or it is placed the first time the US uses air support. You still place it without the US players seeing your placement. It must be placed on the gorge terrain board. You do have one last Zero to come in assist once dawn has arrived.

Japanese Victory Points:
Each VP Area = 5 VPs (3 are in the town)
Each destroyed or permanently routed USMC unit – 2 VP
Each destroyed or permanently routed mortar, MG – 1 VP
Each destroyed or permanently routed USMC tank, SPAT, or Halftrack unit - 4VPs 
 
Special Rules
The battle starts before day light hours. There are two turns of night (visibility only 4”). US units move at half speed and vehicles may not move unless on roads. No air, off-board, or indirect artillery may be fired at this time. Japanese foot units move at full speed and vehicles may only move on roads at half speed. The 3rd and 4th turns are dawn and have 8” visibility. All units function as normal, including off-board assets. Japanese units may “Banzai” when the Human Wave card is played. Once this card is played you may move multiple times per impetus. This card allows you to close assault without a close assault card. All Close Assaults are UP1 until the unit is wiped out. Banzai units never check morale and are not slowed down by suppression. They do fire at the normal reduction for suppressed stand. All suppressed stands still fight in close assault.

Here is the story of that fateful morning. (OOB can be provided in PDF format for anybody that wants them)

Japanese mass in the darkness for their attack! Only one in three US squads were on "guard duty" when the attack was launched.


Several squads of USMC rush to met the Japanese assault.


Hand to hand combat ensues.


On USMC squad routs unralliable! Japanese overrunning the command. The USMC throws in another platoon to halt the Japanese and they fade back into the morning gloom.


USMC tank platoon arrives and the 2nd platoon moves out with them.


Sherman destroys Japanese bunker right in the middle of the 2nd platoon advance.


Troops move through the open fields towards the objects and the rice paddies.


US mortars begin to fire smoke to cover the troops advance.


Japanese 88mm AA gun tucked into the jungle.


US airsupport (Corsair) destroys a Japanese tank.


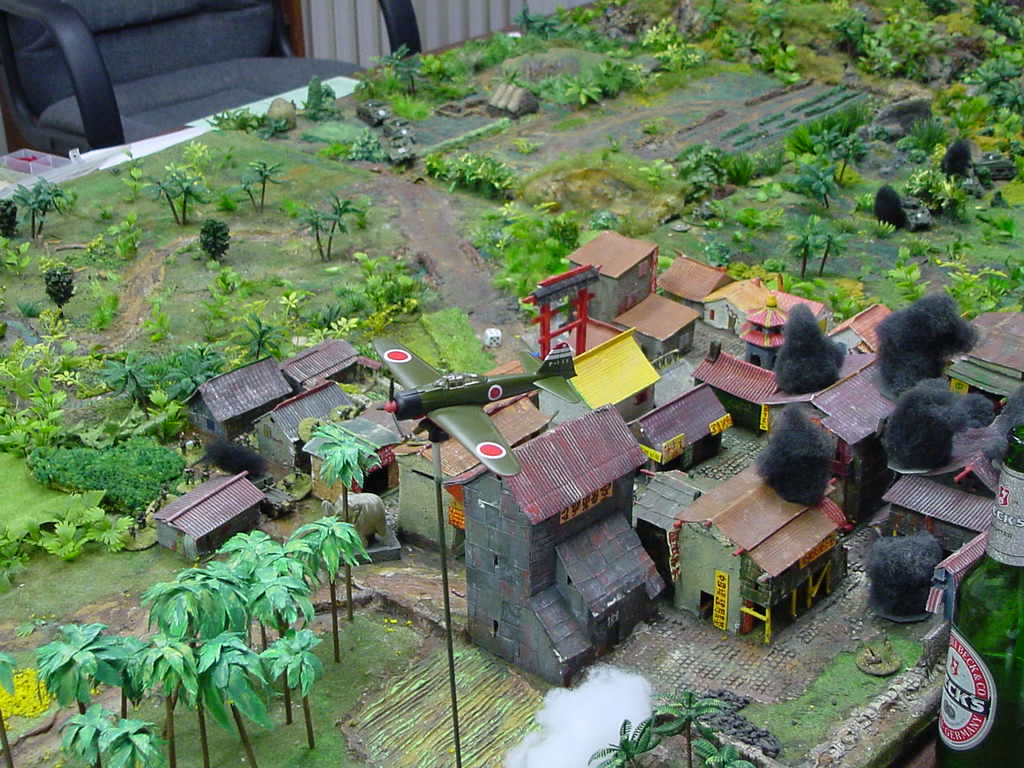
Corsair moving off the table over the town (USMC objective)


boggy ground near the ridge line.


USMC ambushed by a Japanese pillbox (no more than 2 inches in front of them). The Marines were able to silence the bunker without too many casualties.


2nd Platoon reaches the outskirts of town. Red objective star in the distance.


Squad doesn't want to advance out into  the open so they send the tanks first to draw fire.


Japanese mortars hit the Marine infantry.


Japanese AT gun hits Shermans in the rear (there was a cave that it was located in). We just put the model on the board once it fired.


Jap bunker pins the USMC crossing the rice paddies. (I knew I didn't want to go in there!)


Jap AT gun knocks out a Sherman.


Another Sherman takes a direct hit from a Japanese tank


Japanese tank advances out of the town area to attack the Americans.


US Sherman tank takes an objective, but exposes its weaker rear armor to the enemy.


Bad move! Objective returns to Japanese control!


More US artillery hits the ridge and cave system.


USMC squad moves through the rugged terrain of the ridgeline. The Japanese caves are nearby.


US 155mm guns hammer the town while an entire USMC platoon clears the town building by building.


US artillery support raining down death and distruction on the Japanese cave system in the ridge by the river gorge.


USMC squad takes back the objective (blue star).


Japanese Zero attempts to shoot up the USMC squad near the objective on the road.


Japanese received German aid in the form of beer. It wasn't enough. The USMC, with the help of the reserve tank platoon, take the town.


this was another great battle! Look for more in the coming weeks. I have a large amphibious assault battle report to put up next.

Tuesday, August 16, 2011

Pacific War - Battle of Dagami

This is a game we played YEARS ago, but has lots of fun eye candy. I think this was around 2003 when we played. Brent Oman was visiting from Colorado and I wanted to break out my Jungle terrain.

USMC vs Japanese

Some of the photos have been labeled and others have not. Still lots of good stuff to look at. I have about 5 more scenarios worth of photos, but thought I would start at the beginning.

I used Piquet's Blitzkrieg supplement (squad level) with a few modifications (smaller sequence decks).

USMC Objective:

As captain of Company B, 1st Battalion, 2nd Marine Regiment you have been ordered to secure the town of Dagami as your primary objective. All Japanese forces must be removed from the town to allow the 2nd and 3rd Battalion of the 2nd Marine Regiment to break-through. Dagami should be cleared within 50 minutes (5 turns) to coordinate efforts with the 2nd Marine Regiment. As secondary objectives you must destroy or rout as many Japanese units as possible as this will make the break-through have a better chance for success.


Here you can see what the USMC is up against. Jap bunker, just in front of the reload marker at teh top of the photo opens up on the Marines.


Damn that is thick Jungle!


This time the Marines let the tanks go first only to be hit by another Jap bunker (just above and ot the right of the infantry)!


Jap MG was unspotted and attacks the marines at less than 20 yards.


Time to hit the ridge with Naval artillery!


USMC wins the game, but it was bloody costly and full of great tension!