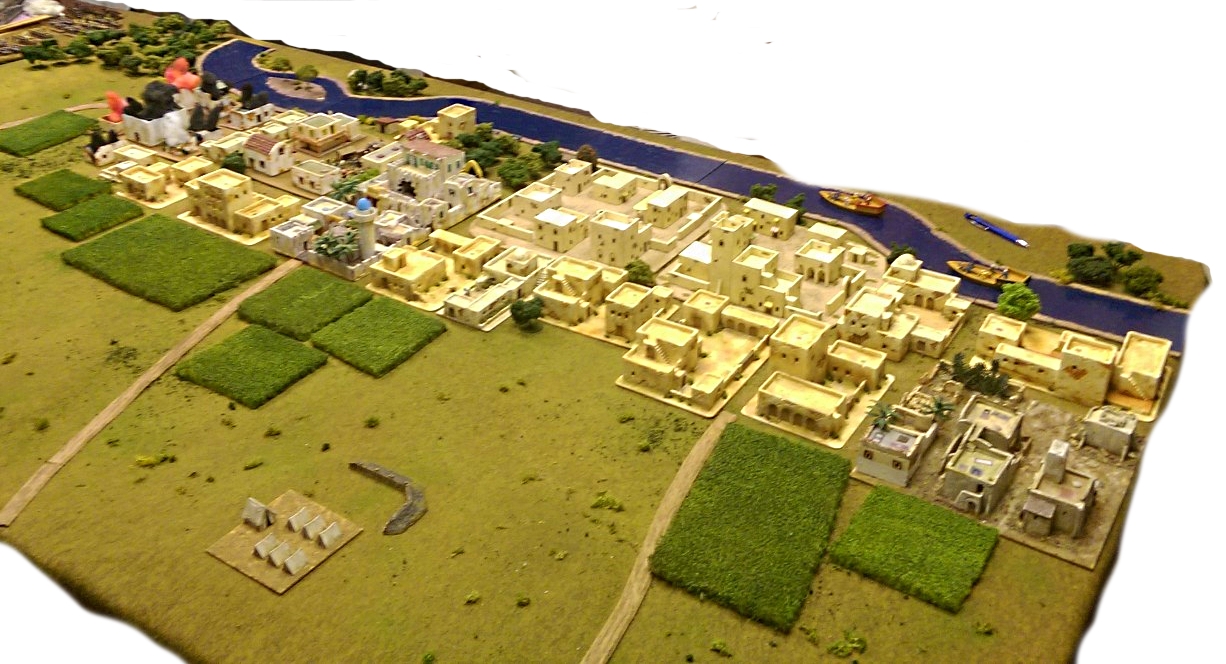
The Ottomans, after losing two key battles, have fallen back on the city of Galati (Galatz, Galadsch), nestled on the banks of the Danube.

The combined Austro-Russian army is assaulting Galati in the pre-dawn hours hoping to gain surprise on the weary Ottoman army. The Ottomans must defend the city while
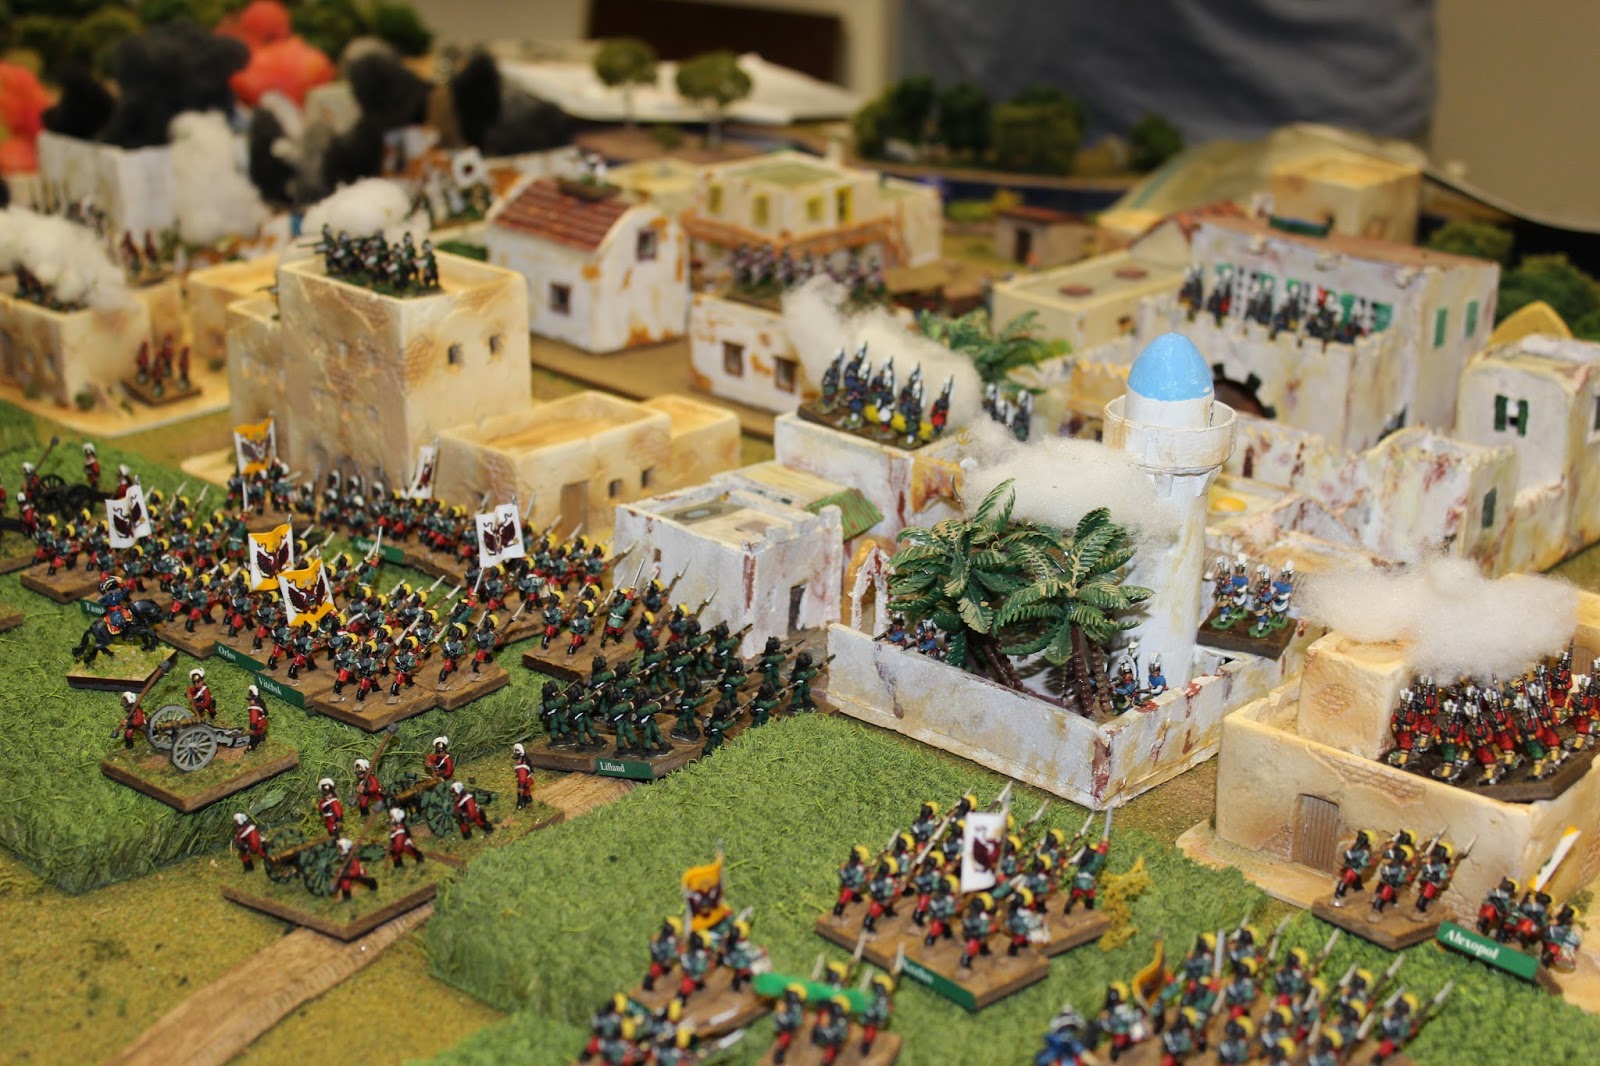
The beautiful city of Galati before the battle.
Victory Points
1 VP for each destroyed\routed unit at the end of the game.
5 VP for Ottomans when the build Pontoon bridge
1 VP for each Ottoman (non-Derbent) unit that crosses the Pontoon to safety.
There are 5 VP locations, with each one worth 2 VPs, except the fortress which is worth 5 VP, at games end for however controls the locations.
How to build Pontoon Bridge?
The Pontoon bridge comes in 3 parts. Two of the parts are built before the game starts. On each Sapper Task card played by the Ottomans, they can spend one 1 impetus. After six impetus spent on Sapper Tasks, the last part of the Pontoon is build. The pontoon cannot be worked on until daylight, turn 2. If they happen to turn a Heroic Moment card, followed by a Sapper Task, they can build spend two impetus for the price of one towards completion of the pontoon.
Impetus Rolling
Each side will have two sequence decks, and will use the following mechanics to resolve impetus. The reason I'm doing this is for the large amount of players and forces on the table.
Each side rolled a D20 for impetus.
Winner
divided their impetus in half adding 4 to each half, then split it between the
two decks.
Loser
got half the winner’s impetus, split it in half, and added 2 impetus to each
half.
Example:
Russians
roll a 18Ottomans roll a 6
Russians
get 12 impetus, divided in half is 6. Each Russian player gets 6 impetus plus
4, for a total of 10 impetus to turn cards and act on them.
Ottomans
get 6 impetus (half the winner's total), divided in half is 3. Each Ottoman player gets 3 impetus plus 2,
for a total of 5 impetus to turn cards and act on them.
Russians will win the first impetus roll no matter what. Russians\Austrians can put one Infantry Move card at the top of their deck to start the game to signify their assault.
Sequence Deck Changes - Ottomans
Add one Sapper Task (scenario bonus) - added to each Ottoman deck beginning turn 2.
Add one Melee Resolution (scenario bonus)
Remove all Cavalry in Open cards (No cavalry in scenario)
Give each Ottoman command one additional Opp Chip starting on turn 2. This will give each "command" four opp chips on turn 2.
Sequence Deck Changes - Russian
Add one Brilliant Leader for Suvorov
Add one Melee Resolution (scenario bonus)
Add one Deployment card (scenario bonus)
Remove all Cavalry in Open cards (No cavalry in scenario)
Sequence Deck Changes - Austrian
Add one Deployment card (scenario bonus)
Add one Melee Resolution (scenario bonus)
Remove all Cavalry in Open cards (No cavalry in scenario)
Town Rules, based on Cartouche 2nd Edition
tbd
Austro-Russian OOB
Russian Commander - Phil
Austrian Commander 1 - Charles
Austrian Commander 2 - Mike P.

Ottoman OOB
Ottoman Commanders - Brian, Steve, and Mike J.

Setup and Plans
I let the players deploy their forces this time, which added to the setup times. We didn't get started until 8pm on the first night.
Ottomans had to deploy across the city to protect all the VPs and their central fortress (5 VPs). The Guard Janissary were deployed just to the left of the fortress after the Russians\Austians deployed.
Since the Russians were the bets troops on the field, the allies decided to lead with them in the attack. The Russians deployed both brigades in the center to the lead the attack against the fortress. The Austrians deployed one brigade to each flank to support the central Russian attack.
I should have forced the Austrians to deploy together to keep the game simpler for tracking impetus, but I liked their plan of attack so I let them deploy this way.
Initial Deployment
The Ottomans deployed first, except for the Guard Janissary command (2 units). Then the Austro-Russian army deployed in any formation, as close as 12 inches from the city. This was a night assault and this captured the situation.
Once deployed the Ottomans could then put their Guard Janissaries anywhere in the city they liked. They chose to deploy them in an open city section in the center of Galati, facing the Russian brigade to the right of the road (from the Russian perspective). This will prove pivotal in the coming battle.
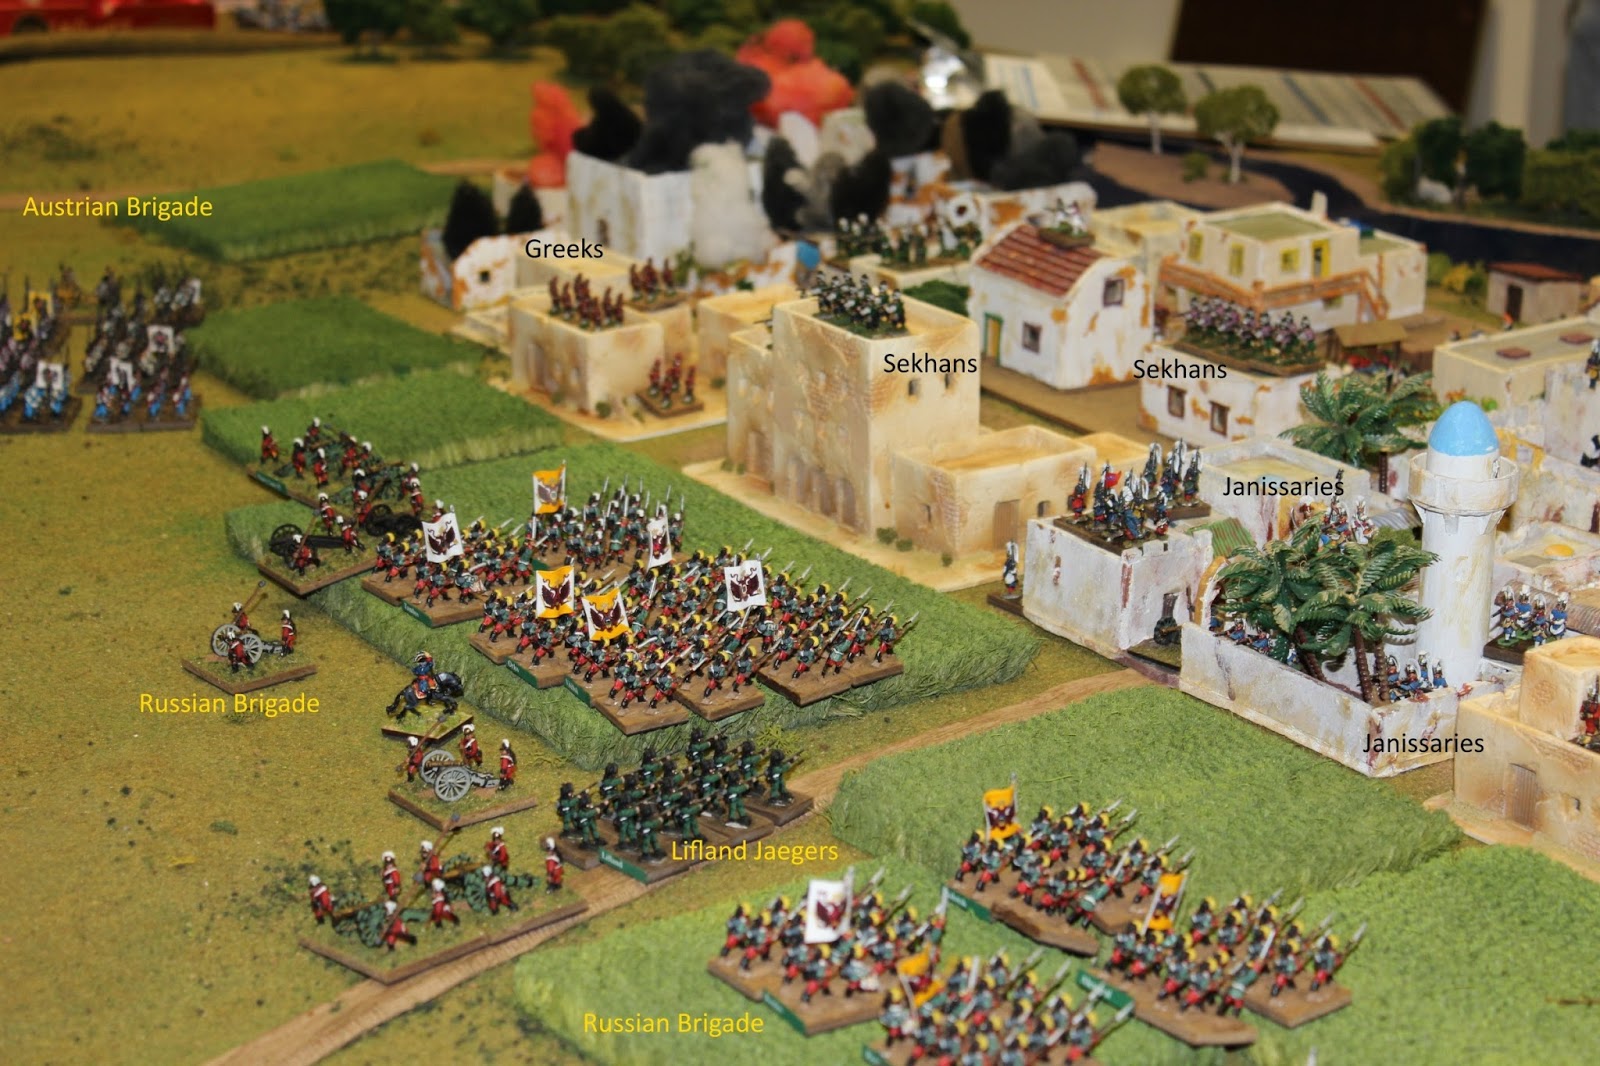
To the right of the photo you can see one Austrian Brigade (Mike P. commanding) closest to the camera, with two Russian brigades in the middle (Phil), and one Austrian brigade (Charles) commanding them.

Derbents, local militia, waiting for the Austrians. Mal Wright made this city section.
A photo from the other direction.
The Battle
I allowed the Austrians and Russians to put an Infantry Move in Open card on the top of their decks if they desired, to make sure the attack was launched successfully. Also, the Allies automatically won the first initiative no matter what was rolled on the dice. Here are a couple photos of the initial move.


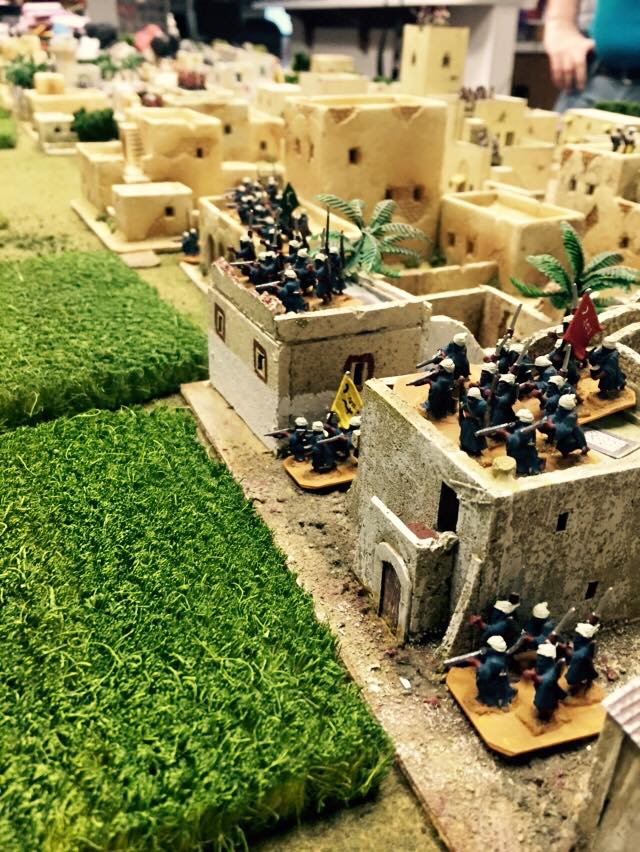
The Ottomans held their fire and started moving their Derbents through the streets to put pressure on the allied attack.

Two Derbent mobs move through the streets while two Arnaut battalions watch.

Mike J, Ottoman commander of the Derbents and other forces.

The Ottoman commanders Brian, Steve, and Mike B. try to figure out their next steps

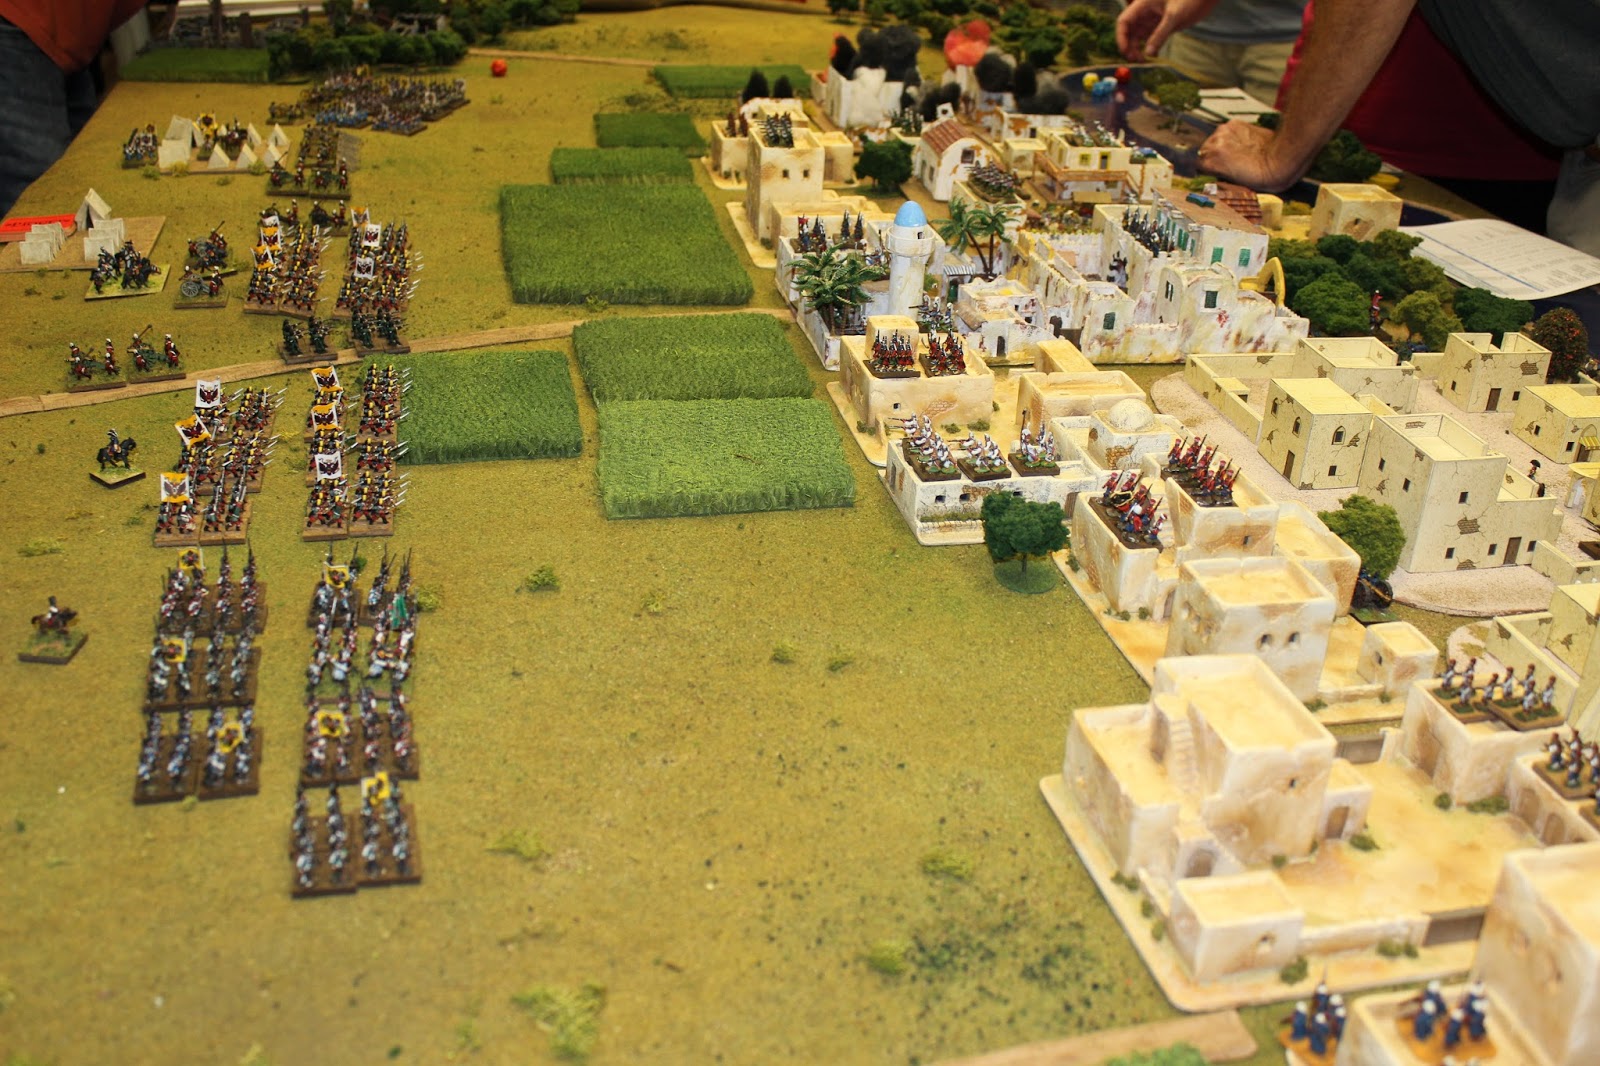
The Allies crash into the city! Ottomans "Opp Fire" (Yellow chips) as they move into contact while in Attack Column in the cover of darkness.

View from the Ottoman's perspective. Damn, that is a lot of Russians!

The Austrians smash into the Greek Arnauts (red uniforms, with yellow Op Chip next to them), just before the Greeks UNLOAD on them. I rolled really well for the Greeks when creating the army. (Fire D12, Melee D8, and Morale D8). The started making the Austrians pay for every inch of ground!

I absolutely LOVE this next photo! Here you can seen 7 Russian regiments moving through the crops and hitting the Ottomans. The Ottomans only had 3 Opp Chips on this side of the table. Due to the night assault they were reduced in their preparedness and had to pick which units would Op Fire. Brian picked the Janissaries and Guard Janissaries, while Steve picked the Greeks. You can see the Lifland Jaegers in attack column attacking the light guns in the entrance of the "old town".

Russian Major General Reck's brigade runs right into the Guard Janissaries!

Overhead shot of Reck's Brigade on the left and Kutusov's Brigade on the right. Ottoman Opp Fire (smoke) does some damage, especially the Guard Janissaries.

Here, the Russian Ouglits Regiment (worst unit in the Russian army), D6 Melee, assaults the White Guard Janissary. To our surprise they rout the Guard Janissary and occupy the city section!

The other Ottoman Guard Janissary is not so easily intimidated, and forces a Russian Polotsk regiment back in disorder in melee, while causing two stand of damage to the other regiment with Op Fire! This is only the beginning for the "Red" Guard Janissaries! The Lifland Jaegers (green uniform) overrun the light gun section. The Russian Sibirsk regiment, pushes the Janissaries back from their initial position. (I accidentally let them advance after melee, shown in the photo, but move them back out because they didn't rout the enemy).

Mike J. sends his Derbents rushing towards the city edge to fight the Austrians. Here you can see the Austrian Grenadiers (center, next to tree) getting pounded by 12# Ottoman guns unlimbered in the streets. Slowly these guns wipe out the Grenadiers over the next two turns.

Nice shot of the entire allied assault

This next photos just geeks me out! So much action and drama. On the right you can see the Ottoman Guard Janissaries (red) holding their ground and ruining Russian regiment after Russian regiment.
Slick photo angle here.

Austrians are easily moving into the city. They were not heavy contested in this right flank sector, but that will all change.

Lifland Jaegers, after routing an Ottoman light gun section in the streets assault an Janissary regiment and drive them back. Here the Lifland can been seen with their first foothold in the city.

View from the Ottoman lines. What is left of the Austrian Grenadiers can be seen here.

Another view of the situation on the right flank of the allied assault.

Lifland Jaegers rout the Janissary regiment (not pictured) and advance into the next city section. The Ottoman command (mounted figure in the street) is vulnerable.

Russians move more regiments into the city while some Sekhans (top right) stubbornly refuse to be dislodged.

Major General Kutuzov (center, bottom) guides two Russian regiments in an assault on the town section held by the Guard Janissaries.

Mike J. brought some of the Derbents out of the city to turn the Austrian right wing's flank. Charles was forced to turn 1/3 of his command to face this threat. The Austrians made a critical mistake on this flank and brought no artillery to this sector of the battlefield. A whiff of grapeshot would have taken care of this rabble.

On the Allied left the Austrian brigade, after getting man-handled by the Greeks, now have three regiments ready to assault the Greeks.

From this view you can see that the Ottomans have another line of defense (l-r, Sekhans, Albanians, and Janissaries) waiting for the Allies.

Good shot of the Derbents coming out to play with the Austrian right flank

Different angle of the Lifland attack of the fort. They blasted the Janissaries out of the fort with concentrated musket fire. They just had to move into the fort (5 VP) before an Ottoman reinforcement can arrive.

Bosnian (top right) and Albanian (bottom right) Arnauts combine fire and slaughter an Austrian regiment and send them routing to the rear.

Lifland Jaegers after blasting the Janissaries out of the fort. One routed Janissary unit is still in the compound, but should be something the Jaegers can deal with.

Lifland Jaegers close-up

Overview of the Russian advance into the city, near the end of turn two.

Austrians gather three regiments to assault the Greeks. The Greeks have been a very difficult nut to crack.

Guard Janissary leader (General #1) orders some Derbent into the buildings to resist the enemy.

The second turn ends on a 2nd tie of the initiative die roll. (Normally, in Piquet, the turn ends on the first tied Impetus roll. I think that happens too often, so I make it the second tied die roll)
After two turns, the impetus count:
Allies - 106
Ottomans - 76
Turn 3
The Austro-Russians jump on the initiative (16 to 8) for the first initiative of the turn. They begin to rally units on an Officer Check card, while softening up the Ottomans with their heavy guns at canister range!
Major General Kutuzov's heavy guns pound on the Janissaries using the mosque as a redoubt


They fire twice (fire, artillery reload card, and fire). They inflict heavy casualties, and the morale challenge is failed by the Janissaries and they rout!

The Russian heavy guns of Major General Reck's brigade attack the stubborn Sekhans holding up the whole Russian assault. They manage to soften them up, but can't dislodge them. This will require cold steel!

This brilliant move by the Egyptian Sekhans is going to cause heartache for the Austrian right wing commander. They are now facing the flank of two different Austrian regiments in attack column.

Egyptians smile for the camera!

The Russian Apcheron regiment assaults those Sekhans routing them with cold steel and positioning themselves for the next section of the city held by more Sekhans and Albanians.


In the next two photos, the Austrians on the left flank finally have the nerve to assault the Greeks. They pay 3 impetus for all three regiments to participate in the assaults which gives them an additional UP1 on each melee resolution vs the Greeks.

The Greeks seeing the dire straights they are in, fight the first melee and withdraw in disorder. Best possible result for them.

On the right flank, the Austrians launch a close assault on the Egyptian Sekhan in hopes of dislodging them before they fire into the flanks of the Austrian flanks! The Austrians are repulsed in disorder! The Austrian' commander's stomach turns sour.

Meanwhile, this Austrian regiment on the right flank routs those pesky Derbents.

And the carnage begins on the Allied right flank. Over 66% of the Austrian brigade is methodically destroyed and routed over the next several initiatives. Here the Egyptians fire into the flank of the Austrian regiment and wipe out three stand, but the Austrians incredibly don't fail the morale check!

Egyptians reload (Musket Reload) and then fire into the flank of the other Austrian regiment. This also hammers the helpless column and routs them.

The Allies get a Move card and advance nearly all their troops into the city. Section after section are occupied, including the mosque.

The Ekatérinoslav Grenadiers have not positioned themselves to assault the Guard Janissaries.

The Russians manage to pull a Manuever card, and wheel their 12# guns to face the Guard Janissaries and fire! This knocks out of stand of the Guard! Softening them up for the coming Russian assault.

This is when the Allies pull the Brilliant Leader card for Suvorov! This was declared an Infantry Move card for the Russians. (Austrians can't act on this card). The Russians move further into the city and prepare to assault Ottomans at every juncture.

Another Melee Resolution card is turned by the Allies shortly after this. The Austrians, knowing the Greeks are still Disordered from the first melee, launch a quick follow-up assault and force the Greeks back. Note the Greeks still haven't lost a stand in the melees, so they will be a formidable fighting force if they can rally.

In the next series of 3 photos, Major General Reck's regiments charge the Sekhans and rout them!


Time for payback. The Russians have 3 regiments assaulting the weaken Guard Janissaries!! The assault is successful and the Russians rout the Guard Janissaries.


What is left of the Guard Janissaries taking cover in another town sector.

In the next series of photos an Austrian regiment and the Russian Apcheron regiment assault the Albanians (in white). The Apcheron are routed!! The Austrian regiment manages to rout the Albanians after this and occupy the sector.


The Bosnians route another Austrian unit and advance to the city's edge. They fire at the flank of the last intact Austrian regiment on the right flank and cause one stand of damage and disorder them.


The Ottomans finally win 20 impetus to the Allied 10 impetus! Ten impetus into this play they turn the Major Morale check and roll a 1!!!!!!!!! At this point Major Morale has collapsed for the Ottomans (they only had one more chip left, compared to about 25 for the allies)

During those 10 impetus the Greeks were once again rallied.

Deepest penetration by the Austrians in the right flank.

Last two shots are of the overall situation at the end of the battle. The Ottomans had only 7 units functioning normally at the end of the game. They had 10 others routed and 2 disordered. They did have about four Derbents (local militia) unhurt, but they are of little combat value.


Conclusion
That was an absolute blast to play.
I really liked how this turned out, but there are a couple things both sides would have done differently.
Letting the players setup their forces cost us about 1 hour of game time. Next time I will set up the forces. I like letting players setup the forces and come up with their own plans, but in this case it just took too long.
Austrians would have given the right Austrian brigade some artillery to hold the far flank while concentrating the infantry brigade's attack.
Ottomans would have deployed their artillery forward on the city's edge, rather than being stuck in the alleys of the city. Had they put the guns on the city's edge they could have hit the advancing Austrians and Russians in their attack columns with canister. It would have been bloody.
Ottomans would have also abandoned the far left flank and used those forces to deploy in depth to defend the critical locations.
Hope you enjoyed this as much as we enjoyed playing this.
Excellent read and scenario Eric. Loved the in-depth reporting from the front lines. As for the miniatures and terrain.... superb!
ReplyDeleteMichael aka WR
Wow, that left me breathless just reading it. Lovely terrain and figures combined.
ReplyDeleteChapeau!
Beautiful game! I love your creativity with the rules and scenario.
ReplyDeleteBrent
Great stuff! Thanks for showing us a great scenario and game!
ReplyDeleteWonderful looking game and great narrative. One might think that such a house by houise assault might be boring, but obviously the opposite was the case here!
ReplyDeleteWhat a fantastic report! Stunning pictures (especially the town imo), and beautiful figures...Thanks for sharing!
ReplyDelete