Thursday, September 29, 2016

SYW - Austria's Revenge?

After the last battle, where the Austrians were completely routed by the aggressive Prussian cavalry, the lads were eager to get back in the saddle and contemplate Austria's revenge.

This battle is even larger than the last. I pre-rated all the leaders (Frederick was skilled this time and there was one Brilliant Prussian sub-commander, while Austria had an Average leader, but two superior sub-commanders) and drew the Army Characterization decks prior to the player's arrival.

Here are a couple shots of the game showing the more open and rolling terrain in this battle, with massive Austrian and Prussian armies.

Bavarian\Hungarian infantry brigade with Croats in the village.


Nice view of the entire battle from the Austrian side of the table. A big seven regiment Austrian cavalry wing closest to the camera.


This is a shot closer to the terrain, with a river passing through and a watermill hard at work


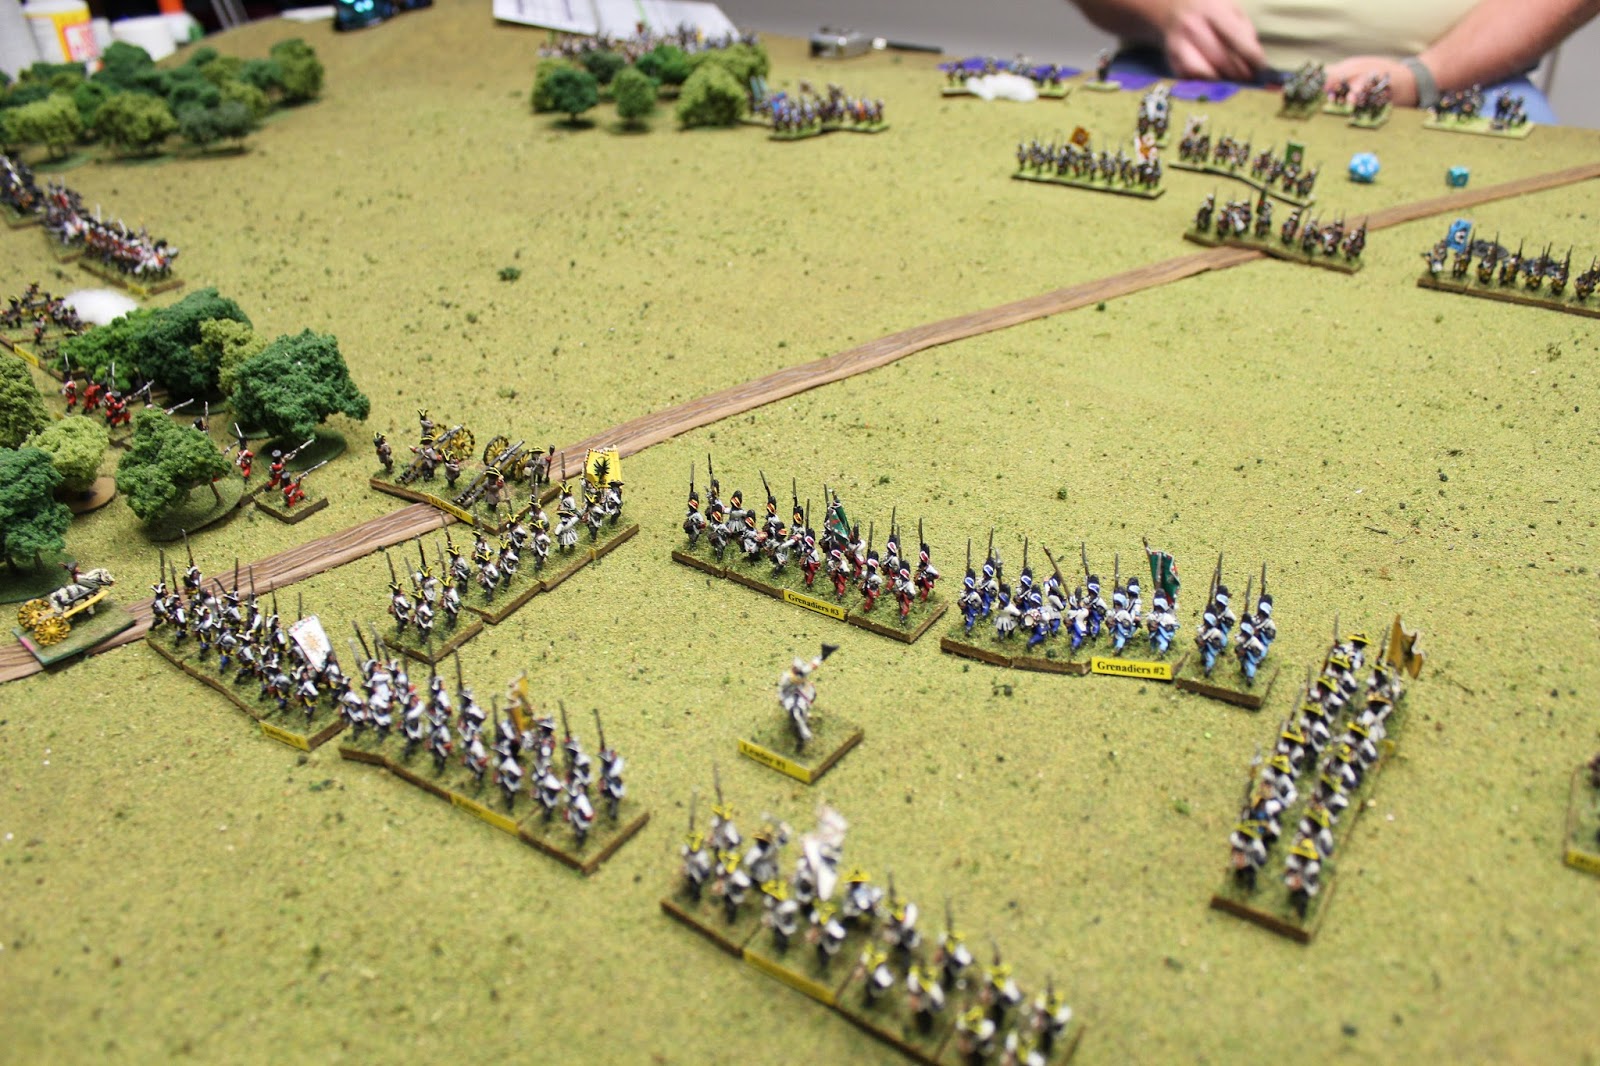
A view of the strong Prussian position next to the Church


Austrian OOB
75 Morale Chips - 2 Superior Sub-commanders, Average C-in-C
Extra Artillery Reload, Heroic Moment, and Melee Resolution in the Sequence Deck
14 German and Hungarian Battalions
3 Grenadier Battalions (elite)
4 Bavarian Infantry Battalions (trained militia)
2 Croat Battalions
7 Cuirassier Regiments (2 Elite)
6 Dragoon Regiments
1 Hussar Regiment
2 Heavy Batteries
2 Light Batteries

Prussian OOB
53 Morale Chips - Skilled C-in-C and one Superior sub-commander
Extra Artillery Reload in the Sequence Deck
3 Grenadier battalions (elite)
8 Musketeer battalions
3 Fusilier battalions
4 Cuirassier regiments (Elite)
4 Dragoon regiments (1 Elite)
2 Hussar regiments (1 Elite)
2 Heavy Batteries
2 Light Batteries

Scenario
This is a three turn scenario, where the Prussians must hold off the Austrian attack for two turns then may begin to withdraw from the table in earnest.

Austrians automatically win the first initiative as they are on the attack

Prussians can give a command a Withdraw order on a Move in Open card on turn 3. All units in this command must fall back on this card. This will allow the units in that command to make a full speed move backwards (6" in line), maintaining their facing, but going Unformed. They could still move back half and not become unformed, but they must move backwards once they have this order. This order can never be changed during the battle.

THE BATTLE

The Austrians win the initiative and their first card is Infantry Move in Open! Tally ho! They first fire their heavy guns once and then move their infantry brigades, followed by the right wing cavalry.


I particularly like the photo below of the long linear lines characteristics of this period of warfare.


The Prussian heavy batteries open up on the advancing Austrian Juggernaut, but manage to roll weary on their quality roll. That means they are a D8 firing. Frederick is most embarrassed.


Prussian Grenadiers, bottom left, await the advance of the Bavarians, while the Prussian heavy battery attempts to weaken the Austrian center.


Continued view down the line all the way to the Austrian cavalry of the right wing.


The Prussian battery loses a stand to Austrian musket fire


The Austrians are pushing in tight and melee the Prussia heavy guns which annihilates the battery.


Prussians opp fire as the Austrians push forward to little effect ...


Except here, where they inflict 3 stands of damage, and rout the Austrian battalion.


The Bavarian\Hungarian brigade advance into certain death with 3 Prussian Grenadier battalions waiting to opp fire (yellow poker chips) at point blank range. Jan is the commander of this brigade and rolls Determined for 2 out of the 3 Grenadier battalions, which is a D12+1 on fire!


Casualties and smoke everywhere as Bavarians are crushed along with a Hungarian regiment.


This is how it looks from Brian's point of view as the Bavarian commander.


With all the infantry combat in the center chewing through morale chips the Austrians launch their cavalry charge on the right wing (7 Regiments vs 4 Prussian)!


Sabers crash and wounded fight as four! Three Austrian regiments smash into the Prussians, while one Austrian Cuirassier regiment peals off and attacks the Prussian light guns just beside the church.


The Prussians win 2 of the 3 melees, but I had to show the one below as this Dragoon regiment was a D8 in melee vs. a Austrian Cuirassier D12, and still managed to rout the Austrian cuirassier! The Austrians will need their second line of cavalry in this scrum


The Prussian grenadiers keep firing and the Bavarians and Hungarians keep falling. Half the Bavarian brigade is now routing or destroyed.


On the Prussian right flank the Austrian cavalry cautiously advance, and the Prussians ATTACK!


Austrian cavalry is bested in melee one regiment after another


Photo taken from the Prussian right wing, and you can see the line is engaged across several kilometers of ground.


The Prussian left wing cavalry command is killed in melee, which throws the whole Prussian wing into chaos.


Although weak,  Prussian battery does some serious casualties with canister fire.


Austrian Cuirassier swirl around the Prussian light guns, but won't close into melee.


More bloody fighting in the center with the Austrians rolling a 12 vs 2 for the Prussians, wiping out 3 stands of infantry and routing this Prussian unit.


On the Prussian left, even though out of command and blown, the 1st Cuirassier manages to rout this Austrian Dragoon regiment, the wheel to meet the flank of the Austrian line!


Another move card for the Prussians and they charge into the flank of this light gun battery. The artillery crew is left dead in a red mist. Austrian personal morale is nearly gone by this point in time.


On the far right the Prussian 2nd Cuirassier melees these Austrian Dragoons and rout them


The Austrian cavalry runs along with all Austrian hope of victory. The Austrian army begins its withdraw. The game lasted 2 turns.


 Another awesome game of Cartouche and hope to get this on the table again before the end of the year. We are going to do some board games over the next couple weeks, to give me a chance to catch up on some things. Cheers!


Tuesday, September 27, 2016

SYW - Frederick Gives Austria a Beating


During E-Con (Eric's mini-convention) in early August, we fought a simple French vs Allies SYW battle, but I didn't take a lot of photos so I haven't written about that. It turns out we fought 3 more battles after that. The first one was the Battle of Reichenburg with a Twist, which I blogged about here.

The second battle was a massive affair pitting my Austrian army vs my recently based and labelled Prussian army, which is the subject of this blog post. Duan was the Austrian commander (rolled up Skilled), while Frederick was the Prussian commander (rolled up Superior). This gave the Austrians and extra Brilliant Leader card and the Prussians 2 extra Brilliant Leader cards in their deck. For those of you not familiar with Piquet, a Brilliant Leader card allows you to turn that card into any card of your choice. Maybe you need a Cavalry Move in Open, or a Musket Reload card, or maybe a critical Maneuver card. It is your choice and can really make for some dramatic moments.

This battle lasted over 2.5 weeks of game nights. This was mainly due to having only two players show up the first week, where they had to both draw their Army Characterization decks, but I also have them maneuver onto the field of battle. This can take some time and the third battle was started with the armies characterized and deployed ready for battle. (I'll post another report soon on that battle).

Rules: Piquet - Cartouche 2nd edition supplement
Figure Scale: 15mm
Armies: Austria vs Prussia in a meeting engagement (Eric's collection)

Week one: Austria (Jan) and Prussia (Brian)
Week two: Austria (Jan and Steve H.) and Prussia (Fred and Steven M.)
Week three: Austria (Jan) and Prussia (Brian)

As you can see the players came and went during this three week scrum.

Unit markers. I was trying some new metallic markers that would stay with the units as each unit has a magnetic base. This means you don't have to remove stands (love this) or pick up status markers when you move a unit.

Red = Routed
Brown = Blown Cavalry
Grey = Unformed (need to change the color)
Yellow = Out of Command
Green = Disordered

The Austrians had the larger army, but this was an early war battle so the Prussians have the possibility of having better quality (depends on their die rolls). I left all the units unrated, so that commanders wouldn't know the final ratings of a unit, just whether they were elite, regulars, or trained militia. All the players really enjoyed this as it provided extra stress when the units were finally committed to battle.

Before we begin I must say that Brian (Frederick) rolled out of his mind this game. He believes he used up "10 years of dice karma" in the two weeks he played. I've known Brian for about 25 years and I would agree with this assessment!

brian's unit rolling
d20 battery
Austrian deployment
heavy destroyed

Below you can see Jan (center opposite side of the table) deploying his massive Austrian army. This was the first time Jan has maneuvered an army onto the table and he would end up with traffic jams all night long trying to get folks into battle lines. Meanwhile, Brian has been playing Piquet and SYW for 20+ years with me.


As the armies move into their positions on the battlefield Brian deploys his Heavy battery on the only hill large enough to see over the top of other troops. He then declares his battery is firing to catch the Austrians before they can complete their deployment out of columns. He rolls for his unit quality and rolls a natural 20 on a D20!!! This is a D12+1 unit for fire! Brian then proceeds to not hit a thing with this battery on the next three die rolls! However, the Austrians will become scared of this beast and do everything in their power to avoid it the rest of the battle.


Jan's center infantry commands struggles to find enough room to deploy, but his batteries unlimber and destroy the other Prussian heavy batter before it can limber! Frederick is not happy!


Here you can see both armies have nearly completed their deployment. In the middle you can see two black casualty markers in the Prussia area near the road. This was the destroyed heavy artillery battery.


The Austrian left wing, overflowing with men and horses! That is a CLASS III woods to the right.


Frederick plans his attack in the center while delaying on the flanks.


A view from the Austrian center looking at the Prussians advancing.


The Prussians advance their two infantry commands in the center (on the left the combined Grenadier-Fusilier command, and the Musketeers on the right)


Brian splits off the 1/20th Grenadier to threatened the overwhelming Austrian cavalry brigade.


The Prussians take casualties advancing through the artillery fire, but the Grenadiers manager to destroy the Austrian heavy guns with musket fire.


In the center, the Musketeers destroy the Austrian light guns with volley fire.


More of the Fusiliers get into the action, with point blank fire cutting through both side's regiments.


The above photo was the last I took on the first night. Both sides were poised to pounce on each other. Then came night #2 and boy did things change. The Austrian left became confused and ordered a redeployment of the entire left hand brigades (both infantry and cavalry brigades) to move to support the Austrian counterattack in the center. This left only 2 cavalry and 1 heavy artillery to hold the line while the rest of the contingents begin to maneuver away from the Prussians. The right wing Prussian commander, seeing this vulnerability, decides to commit the entire Prussian cavalry wing, plus the Prussian Hussars in reserve to an attack against the Austrian left wing. They catch the Austrians napping and overrun the heavy guns (Heroic Cavalry Move in Open + Melee), then route the two remaining Cuirassier regiments protecting that flank. Here is the first photo of the night showing the black casualty markers (that is where the battery was when the Prussian Cuirassier overran them), and the same unit hits another Austrian infantry unit in the flank and wipes them out!


In the center, Jan's Austrian Grenadiers are laying waste to the Prussian musketeers. Check all the casualty markers in the photo below.


Here you can see the overview of the Austrian left wing. The Prussians are attacking from both the front and flank and this will bode evil for the Austrians


The Austrian Cuirassier hit in the flank and rout.


Meanwhile, on the Prussian left flank the Prussian cavalry and grenadiers move forward


The Austrian croats slip into the woods between the cavalry and the Prussian grenadiers, making the Prussian command send in a Grenadier battalion into the woods to clear them out!


The croats are silenced with little effort and the 1/20th moves forward and fires in the Austrian cuirassier and routs them.


Seeing the chance for victory on both flanks the Prussians launch into the Austrians on their left flank.


Meanwhile on the Prussian right flank they continue to catch Austrian regiment after Austrian regiment out of position and destroy them.


 In the center the Austria inertia has limited their advance and the Prussians hold their ground in the center, but most of the Prussian Musketeers have been crippled.


A view of the Prussian right from the Prussian perspective.
 

Prussian Dragoons (red flag) hit another Austrian Dragoon regiment in the flank.


Austrian morale is near zero and they manage to bring a fresh infantry battalion to bear against the Prussian Cuirassier, only to miss with their first fire at point blank range.


Austrian morale collapsed at this point and we called it a game! Some really amazing drama in this battle and Frederick administered a serious ass whipping in this one.