Showing posts with label FoB3. Show all posts

Monday, December 7, 2020

Vauban's Wars - Powder and Food Supply

This is the next installment of Vauban's Wars mechanics regarding Powder and Food Supply

You can order the rules directly here: 

Philipsburg 1688 (click for larger image)


Powder Supply

Both the Garrison and Besieger have their Powder Supply tracked during the siege. As players reload their artillery (not infantry) they track how many times they reload. The more you reload the greater the chance of losing a Powder Supply. If you reload your artillery too much the Powder Supply is lost automatically. If you explode a mine you also automatically lose a Powder Supply in addition to the normal supply check. A powder supply check is done on each player's Power Supply Check card. This means that the players won't know exactly when they will be forced to check if they have lost powder.

The amount of Powder each side has is determined by scenario, fortress size, which is then coupled with a random die roll. 

Other events like fire, Critical Damage, weather, and sabotage (via Espionage) can also reduce Powder Supply.


Food Supply

As with most tedious supply\logistics in siege warfare, I have abstracted Food Supply for the garrison in Vauban's Wars. The besieger is always assumed to have enough food for their siege. The garrison, isolated and surrounded, is assumed to have a finite amount of food for the soldiers and civilian population under siege.

The garrison player will start with X amount of food and will lose one food every turn. The amount of food they begin the siege with is determined by the type of fortress combined with a random die roll. The garrison  will lose their food due to either a Unique Event card played during the turn or if the turn ends early due to weather or tied initiative rolls. (There are reminders on the cards and charts for all these conditions) In addition, the garrison can lose food supply due to raging fires in the town, Critical Damage, and to sabotage via espionage! 

When the garrison's food supply reaches zero their Popular Support may fail and then will have to surrender. Only extremely long sieges should see the food supply reach zero, but it is something important to keep track of during a siege. 

All Vauban's Wars blog posts:

https://dinofbattle.blogspot.com/search/label/Vauban%27s%20Wars

Vauban's Wars main page:

https://dinofbattle.blogspot.com/p/vaubans-wars.html

Thanks for taking a look around!

Eric


Friday, August 28, 2020

Vauban's Wars - Espionage and Security

This is another installment in a series of blog posts discussing parts of Vauban's Wars rules I have released.

Rules Book, PDF, and Custom Casino Cards are now available!!

Espionage in Vauban's War

In Vauban's Wars there is a game of intrigue going on under the covers. Each player will be able to do espionage versus the enemy. This allows players, with some risk associated with it, to gather intelligence about their opponent's situation.

The chance for espionage happens when a player turns their own Espionage Card. One spy of unknown quality is given to each side for free, and additional spies may be "purchased" during the game should your original spy make the ultimate sacrifice. The quality of the spy is not known until they are sent on their mission, and the mission can't be cancelled just because your spy may not be of the best quality.

Spy quality is from "scoundrel" to "master" and is represented by a die type. The higher the die type the better the spy. For instance, the scoundrel is a D4, while the master is a D12. 


Espionage Missions

Here are some of the items that a spy is capable of doing during their espionage attempt and a few are restricted to garrison or besieger only:

  • Current Siege Morale Points, within two points.
  • Current or initial strength of a wall, bastion, ravelin, or gate section. Pick 3 sections per success.
  • Whether there is a Sortie or Assault card in the enemy’s deck. 
  • Current Powder Supply.
  • Garrison’s current Food Supply.
  • Garrison’s Popular Support Die.
  • Mining\Countermining – divulge the target, progress, and Explosive Level of one mine\counter-mine. 
  • Relieving Army Arrival. Garrison tells the besieger on what turn the relief army will arrive.
  • Sow Discontent. Turn the population against the garrison or reduce morale of besiegers. 
  • Contaminate Food – Garrison loses 2 food supply.
  • Desertion (vs Besieger only) – Success means one stand permanently lost by a regular or raw unit. 
  • Location of Garrison’s (if any) explosives placed outside of a gallery.

Success Hangs on a Knife's Edge

The Spy's quality die is rolled versus the enemy's Security Die (normally a D8). I will discuss the Security Die in the next section.

If the spy wins the roll his\her espionage is successful and the other player must reveal the information they want or the action they are seeking to do. If the spy doesn't beat the Security Die the results could be they escape and live to spy again, become captured and executed, or they can be tortured or swayed with promises of fortune to give up information about their previous benefactor. :-) 

Below: Polish army manning the walls of Praga in 1794.


Security in Vauban's Wars

Security (and the Security Die that represents them) is how I have abstracted several situations in Vauban's Wars that would need localized forces without representing them as units on the table. Security in the town is considered to be both the garrison's infantry on patrol and local constables keeping the peace around town, the counter-espionage team to catch potential spies, and for trench raids they are local guards protecting sappers and artillery units. The Siege Die is used in three places in the rules: 

Besieger\Garrison vs Espionage

Garrison vs Coups de Main

Besieger vs Trench Raids

The Security Die is normally a D8, but could be adjust up or down one die type per scenario if required. Another option is to adjust the Security Die for just one of the three options above and leaving D8 for others.

Below Austrian Grenadiers on a Trench raid. These sappers would be protected by the Security Die, which can be further modified in the sappers favor, but  additional infantry units nearby.


Well, I hope you enjoyed this installment for Vauban's Wars!


Monday, August 17, 2020

Vauban's Wars - Available for Pre-Order!!!

It is with great joy that I can announce the availability of Vauban's Wars to be pre-ordered from Piquet Inc. The link below will take you to the website to order a hard copy of the rules and the very nice casino cards to enhance your Vauban's Wars sequence deck. The rules and PDF versions will be available to purchase directly on the week of September 14th, 2020, which nicely aligns with my birthday! :-) Note that the book (hard copy) comes with sequence deck cards on thick card that can be cut out and sleeved. The custom casino cards are an enhanced version of those cards (see photos below).

Once again, you can pre-order the hard copy along with custom casino cards now.
On the week of September 14th, those pre-orders will ship. 
On the week of September 14th you can order and download the PDF versions if you rather have electronic copies of the rules.

More info and pricing can be found later in this blog post.

Pre-order Rules Book here: 

Pre-order Custom Casino Cards here: 


The rules cover sapping, mining, countermining, weather, disease, unique events, coups de main, powder supply, food supply, espionage, trench raids, etc.            

Front Cover


Back Cover


Hard Copy ($40)

Includes:
1 x Rules (97 pages) 75 pages of rules, and if you don't do any mining in the siege the rules are only 63 pages. Spiral bound and full color.
2 x Quick Reference Sheets (double-side, thick card)
1 x Turn & Weather Track (single-sided, thick card)
1 x Powder Expenditure Track (single-sided, thick card)
6 Pages of Sequence Deck cards to cut out (single-sided, thick card that you can cut out and sleeve)

Electronic Copy ($25)

Set of five PDFs: Rules, Quick Reference Sheet, Powder Expenditure sheet, Turn & Weather sheet, and Sequence Deck cards.

Optional Casino Cards ($14.99)

Standard Poker deck with 54 cards. (2.5" by 3.5") These just give you a very nice set of upgraded cards along with a couple blank cards that you can use to add new events or siege ideas. These have unique card backs for each side in the game.

28 x Garrison Cards (including 5 blank cards)
25 x Besieger Cards (including 5 blank cards)
1 x Proof of Purchase card


More information about Vauban's Wars see this page in my blog:

http://dinofbattle.blogspot.com/p/vaubans-wars.html

For discussion, you can join the following sites:


Cheers!
Eric


Vauban's Wars - Trench Raids

Hi,

I'm doing a series of  insights into some of the rules and mechanics of my upcoming ruleset: Vauban's Wars!

This time we are talking about TRENCH RAIDS!

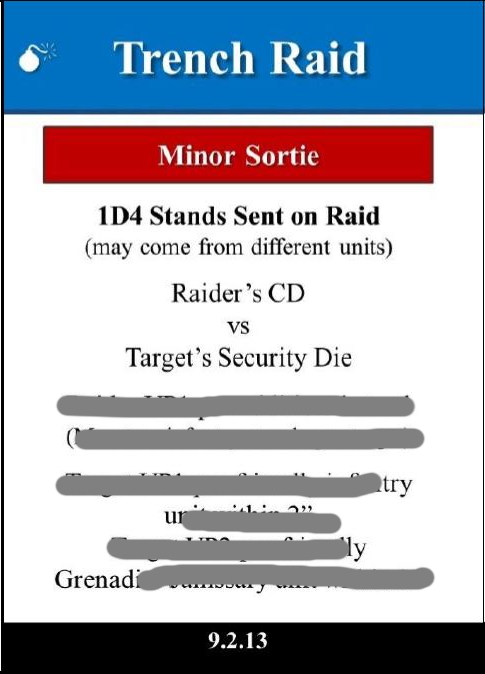
These were minor sorties launched by the garrison to disrupt or damage the besieger's sappers, artillery, or siege works. They would be a company or two in size. The information below will give you a general idea of how it works, but the details are in the rules.


Trench raids are vital as part of an aggressive defense and can delay the success of a siege by a week or two if done right. This could be the difference in a siege outcome.

General Mechanics

When the garrison player turns a Trench Raid card, they can send 1 to 4 stands of infantry, plus sappers if they are going to attack empty siege works, against the besieger's sappers or artillery.

They can't send more than two infantry stands per target. So if you have 4 stands of infantry going you would have two targets with two infantry stands designated against each target.

The garrison designates the best combat unit as their base Combat Die, and that is modified for an additional stand sent into the raid.

The besieger uses their Security Die as their base Combat Die, which in turn is modified by local infantry units that are close enough to the target of the raid to defend against it.

As mentioned before here are the possible targets:

  • Besieger's Sappers
  • Besieger's artillery units
  • Besiegers empty parallels, saps, or gun emplacements.

If the garrison's trench raiders roll high enough they can force the target to retire, force the target to retire with loses, or eliminate a target (they would likely need to be weakened unit to do this). 

If they roll high enough against empty siege works they will make them unusable. This forces the besieger to rebuild the siege works to use them. This can be extremely frustrating to the siege timetable.

On the other hand, if the Trench Raiders roll too low they will be sent packing back to their parent units with UI loses. Below we can see the Austrians doing a trench raid with two targets. One target is two infantry vs. sappers, while the other is one infantry vs. sappers. Raid #1 is by one line infantry unit, while Raid #2 is led by Grenadiers and one line infantry in support. In both cases, the sappers have friendly support which will increase their Combat Die value.


Yes, this is a risky event for the garrison, but the positives outweigh the negatives most of the time.

Hint, Garrison player should use Grenadiers or Elite Light infantry as the lead combat unit in Trench Raids.

Cheers!

Eric

Vauban's Wars main page


Sunday, June 7, 2020

RJW - Japanese Imperial Guard Division, 1st Army


The Imperial Guards Division is the second division I've completed painting and fielding for my Russo-Japanese War games. Most of the figures were already painted when I bought them, but I had to rebase, flock and do some touch-up painting to prepare them for battle. It was quite a lot of work.
  
The Imperial Guard was part of the Japanese 1st Army and fought in the following engagements during the war: Yalu RiverMotien Pass (Motienling), LiaoyangShaho, and Mukden. The division fought in all major engagements outside the Port Arthur siege\assault.

The Imperial Guard uniform had red cap band and red collar, while the LINE regiments had yellow cap bands and yellow collars. These figures are in the early war winter dark blue uniform but the Guard Cavalry is in the khaki uniform that was issued later. All regiments and brigades are color coded on the back of the base for easier identification during a game.

Infantry figures are 95% Frontier miniatures (15mm), while there are a scattering of Irregular miniatures throughout the commands stands. One command stand has Falcon USA figures in it, which are very nice. Artillery is from the Really Useful Guns range sold by Irregular Miniatures. Cavalry figures and their dismounted counterparts are also from Irregular miniatures. Flags were made from clipart, and touched up to add blue-ish outline, which I then touched up with paint.

The commander of the Japanese Imperial Guard is Lieutenant General Hasegawa, and he was in command of the Imperial Guard throughout the war. He can be seen in the photo below.


Below is General Baron Hasegawa in front of the artillery regiment.

Imperial Guards Division (1st Army) Order of Battle

Commander: Lieutenant General Hasegawa

1st Brigade: Major General Asada
     1st Guard Infantry Regiment (3 battalions of 4 companies each)
     2nd Guard Infantry Regiment (3 battalions of 4 companies each)

2nd Brigade: Major General Wabanabe
     3rd Guard Infantry Regiment  (3 battalions of 4 companies each)
     4th Guard Infantry Regiment (3 battalions of 4 companies each)

Attached:
     Guard Artillery Regiment (36 guns) 6 batteries of six 70mm Arisaka Field Guns (Col. Kumamoto)
     Guard Cavalry Regiment (3 squadrons) (Lt. Col Kasa)

Entire Guard Division


1st Brigade on Parade


Major General Asada, commander of the 1st Brigade, Imperial Guards:

Below is my version of Major-General Asada of the 1st Brigade along with his regimental commanders:


2nd Brigade on parade:


Major General Watanabe, commander of the 2nd Brigade, Imperial Guard:


More of the 2nd Brigade, 3rd and 4th Guard regiments


Guard Artillery Regiment, six batteries (stands), with 6 guns per battery.


Colonel Kumamoto, commander of the Imperial Guard Artillery Regiment (figure on round base above):


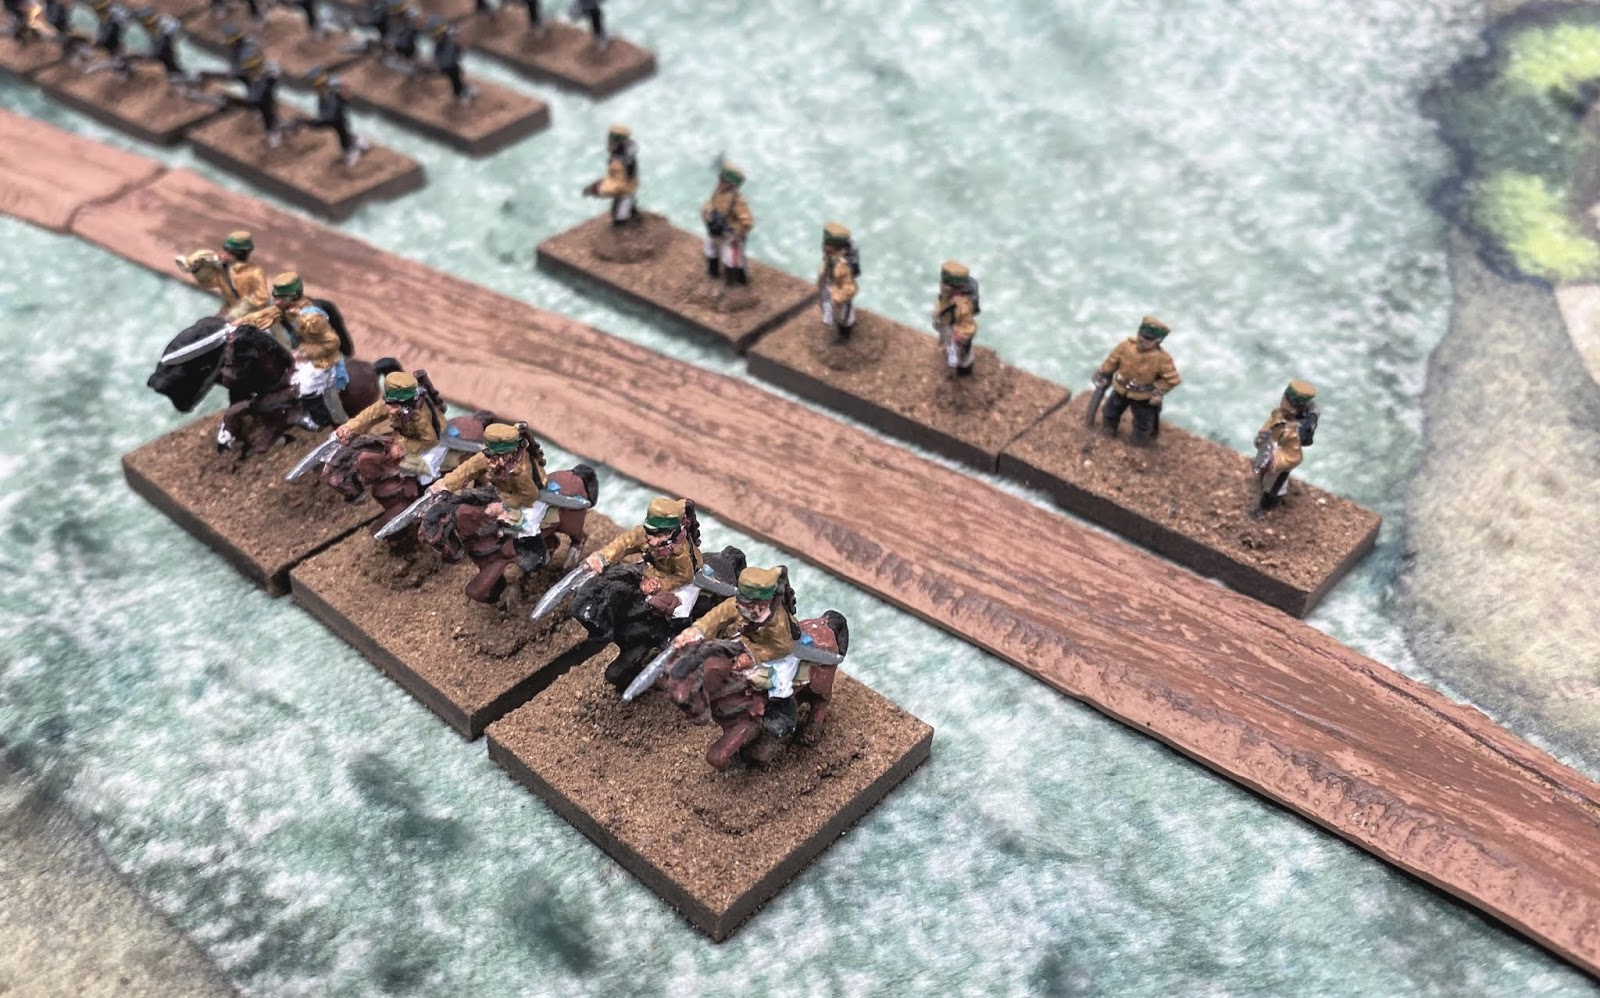
Guard Cavalry Regiment, with dismounted stands. Cavalry regiments attached to the division were small 3 squadron regiments of about 300 men per regiment. I gave this regiment a Hotchkiss MG too.


That is my Japanese Imperial Guard Division! So excited to get them on the table!

Japanese 2nd Division here.
Japanese 12th Division here (tbd)

Sunday, April 12, 2020

RJW - Japanese 2nd Division, 1st Army

   My fascination with early 20th century warfare continues with the Russo-Japanese War (1904-1905) land warfare. I have nearly assembled everything I need for this collection and I'm going to start posting my Japanese Army divisions and first up is the 2nd Division of the First Army!

   The 2nd Division is the first division I've completely painted and is ready to take the field for my games. Most of the figures were already painted when I bought them, but I had to rebase, flock and do some touch-up painting on them to prepare them for battle. (much more work than I thought)
  
   The 2nd Division was part of the Japanese 1st Army and fought in the following engagements during the war: Yalu River, Motien Pass (Motienling), Liaoyang, Shaho, and Mukden. The division fought in all major engagements outside the Port Arthur siege\assault.

   I will be able to use the 2nd Division as a proxy division for other divisions if needed. I will field units for the 3rd and 15th brigades, along with the attached assets, plus Telegraph and Medical detachment.

Not to stray too far off, but my blog has just now crossed over 400,000 hits, which I think is pretty cool for a blog about wargaming. Thanks to everybody that has dropped by over the years!

Click on photos for larger versions.

General Baron Nishi, commander 2nd Division, 1st Army


"If I were asked to name the chief characteristic of the Japanese Infantry, I should say that it was its tenacity."
-- Major Joseph E. Kuhn, US Military Observer attached to the Japanese 2nd and 3rd Army


3rd Brigade Commander: Major General Matsunaga


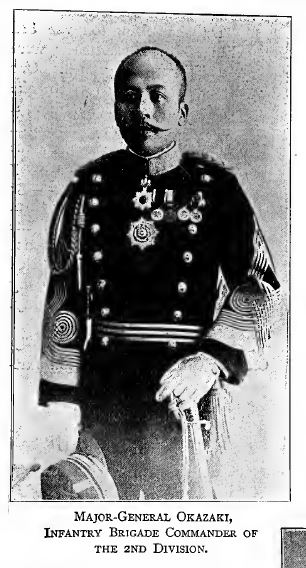
15th Brigade Commander: Major General Okazaki


2nd Division on Parade


OOB Japanese 2nd Division

2nd Division: Lieutenant General Nishi
     3rd Brigade: Major General Matsunaga
          4th Infantry Regiment (3 bns, 4 companies each) - Lt. Col. Yoshida

          29th Infantry Regiment (3 bns, 4 companies each) - Col. Shimada 
     15th Brigade: Major General Okazaki
          16th Infantry Regiment (3 bns
, 4 companies each) - Col. Taniyama
          30th Infantry Regiment (3 bns, 4 companies each) - Col. Kawasaki 

Attached:
     2nd Artillery Regiment (36 guns)

          2 battalions, 3 batteries each, six guns per battery - Colonel Tada 
     2nd Cavalry Regiment (3 squadrons) - Lt. Col. Akiyama
    

Support:
Ammunition Columns (3 artillery, 4 infantry)
Medical Detachment
Pontoon Train
Telegraph Detachment
2nd Engineer Battalion
Provisions Columns
Horse Depot
Field Hospital

Source: British General Staff, The Russo-Japanese War, His Majesty's Stationary Office, London, 1906-1908.  


Originally, I was going to field the Engineer\Pioneer Battalion, but later read that they never really fought as a battalion, so I'm going to use them to fill out the 12th Division's forces.

A Japanese division is roughly 14,000 combatants and 36 guns (plus 6000 non-combatants).

Using BARRAGE basing, each infantry battalion is 12 figures on 4 bases. Standard basing is 3 figures on a 1.5 x .75 inch base. Each regiment would have 38 figures, which includes three 12 figure battalions figures and a two figure Regimental command stand.

2nd Artillery Regiment


2nd Cavalry Regiment
3 squadrons, and 3 dismounted stands


 3rd Brigade: Major General Matsunaga
          4th Infantry Regiment - Lt. Col. Yoshida (Irregular Miniatures - summer khaki)


          29th Infantry Regiment Col. Shimada


Each regiment has a unique color label.

15th Brigade: Major General Okazaki
          16th Infantry Regiment  - Col. Taniyama
          30th Infantry Regiment Col. Kawasaki 

Frontier miniatures for the infantry regiments


MARCHING SONG OF THE 9TH REGIMENT
Part of the 4th Division, 2nd Army

(This Regiment is mainly composed of men from the province of Omi, and the shores of Lake Biwa. The original was composed by Lieut. Umemoto, the " poet-lieutenant.") NOTE: almost sounds like an Iron Maiden song!

The bugle sounds, the war begins,
The war that's to punish the Russians' sins

Our Emperor calls us and bids us fight,
In his behalf for Justice and Right.
So forward march my comrades brave,
Let us face the Russians nor fear the grave


Chorus. 
We'll die if need be, but
we'll ne'er disgrace
The flag of our country,
the pride of our race :
Our colours shall lead in
the onslaught's van,
As becomes the pride of the
brave Omi clan.


...


Hope you enjoyed!

Japanese Guard Division here.
Japanese 12th Division here. (tbd)

Thursday, April 2, 2020

Vauban's Wars - Custom Cards

Good morning gamers!

The proof copies of my Vauban's Wars custom card deck have arrived.

The rules come with cards printed on paper, however folks may want to pimp out their cards with these custom cards! They are true casino style poker cards and have a great feel to them.

Here are a couple photos of the cards. The Garrison cards have a blue top with a unique fortress map on the back, while the Besieger's cards have a red top and an assault painting on it. This will allow players to easily identify which cards belong to each player no matter which side of the card is visible.

Also, there are little cannon-ball icons on all the base deck cards, theses are the cards you always have in your sequence deck. Each turn you grab these 11 cards, then add three more for a total of 14. These extra three cards can vary based on weather, leadership quality, and army.

Lastly, there are five blank cards for each side that you can use to make your own different cards or replace an existing card if it is lost.

The rules should be ready to send to the printer and get a proof copy by mid-April. Then I hope to have them reviewed and ready for production by May 1st. There is light at the end of the tunnel! Some photos!