This post will describe the game we played to simulate the early portion of the Battle of Hohenfriedberg, between the attack Prussians, and the Austro-Saxon army. This battle took place during the War of the Austrian Succession.
First, I've been pretty busy and have based, flocked, and touched up the following units.
- 4 regiments of French Heavy Cavalry
- 2 Battalions of Prussian fusiliers
- 1 Battalion of Prussian Musketers (22nd)
- Luckner's Hussars (Hanover)
- Horse Grenadiers (Hanover)
- Freitag (Hanover) skirmish infantry
- 2 x Generals (one British, one French)
- 1 x British Highlanders skirmish infantry in this period.
- 1 x Royal Scots battalion
- 1 x Grenadiers de France
- 5 x Russian artillery batteries!
- 5 x Austrian Limbers
- 6 x Prussian Limbers
- 4 x Russian Grenadiers rebased (needs flags, flocking, and labels)
- 15 x Russian Line units rebased (needs flags, flocking, and labels)
- 5 x Russian Cavalry (needs flocking and labels)
Map from German general staff: Die Kriege Friedrichs des Grossen 1744-1745 T2 B2.pdf. The orange rectangle is the rough outline of my battlefield.

Scenario
Rules - Cartouche 2nd Edition by Piquet Inc. Instead of pre-rating the unit's combat\morale values before the game, players rolled for them as needed. This adds a lot of drama to the game, as those Elite Grenadiers may be weary from marching all night long, or they could be determined!
Figures - 15mm Old Glory (Eric's collection)
Terrain Mat - Cigar Box
Town - 10mm PaperTerrain
Roads - Old FlexTerrain by Jim Brokaw
Bath tubed - Using 2/3 the amount of units in the battle (still a lot of units on the table).
Custom Piquet Decks for the Period by David.
Labels: Austrians have yellow labels, and Saxons have an orangish label.
Scenario special rules based on the time period and historical battle:
- Cavalry takes 3 hits per stand (I really liked how this turned out and will likely do this with all my Piquet Horse and Musket games. Another option is to leave them at two hits, but count each cavalry unit as two units, elites as three)
- Cavalry must advance on Cavalry Move in Open until the first melee.
- Cavalry must melee if in contact with enemy. (Melee Resolution card)
- All fire is DOWN1 on first turn due to darkness. (Battle started around 5am)
- Prussians can Oblique, while Austrians and Saxons may only incline move.
- Grenadiers can melee on Cavalry Melee Resolution card.
- Altered the Pursuit\Post battle rules to help refect how I feel cavalry behaved during this time period.

Background
I'm only fighting the early portion of the battle as it was really two battles in one (early morning and mid-morning). I got the idea from Charles Grant's Refighting History Vol 6 which covers this battle and refights it in two games. Like Charles I'm refighting the early portion of the battle (5am - 7am) which whirled around the town of Pilgramshain. I'm finally going to get my Saxons into a fight on the tabletop! The picture below is taken from the Austro-Saxon baseline, with the Prussians coming pell-mell from the other side.

Some of my Saxon units, I just love their look and flags.


Dawn's Early Light
Here are some photos of the battle just as dawn crept across the fields around Pilgramshain. I tried to put text into most of the photos so you know what you are looking at.


Nice shot of the two enemy cavalry forces just before all hell breaks loose. Prussians on the right, with Austro-Saxons on the left.

Clash of Sabers
The battle started with a MASSIVE cavalry charge by the Prussians into the awaiting Austro-Saxon Cavalry Brigade. The Prussian commander was able to maneuver 5 regiments into contact with the front four Austro-Saxon regiments for a slight advantage in numbers.


The total impact in view:

The Austro-Saxons routed most of the Prussians on the first round of melee and were stuck in a continued melee in others.

Of course, the best Austrian Cuirassier unit, Bretlach Regiment, routes without dignity! The Saxon infantry marching across the stream are not impressed.

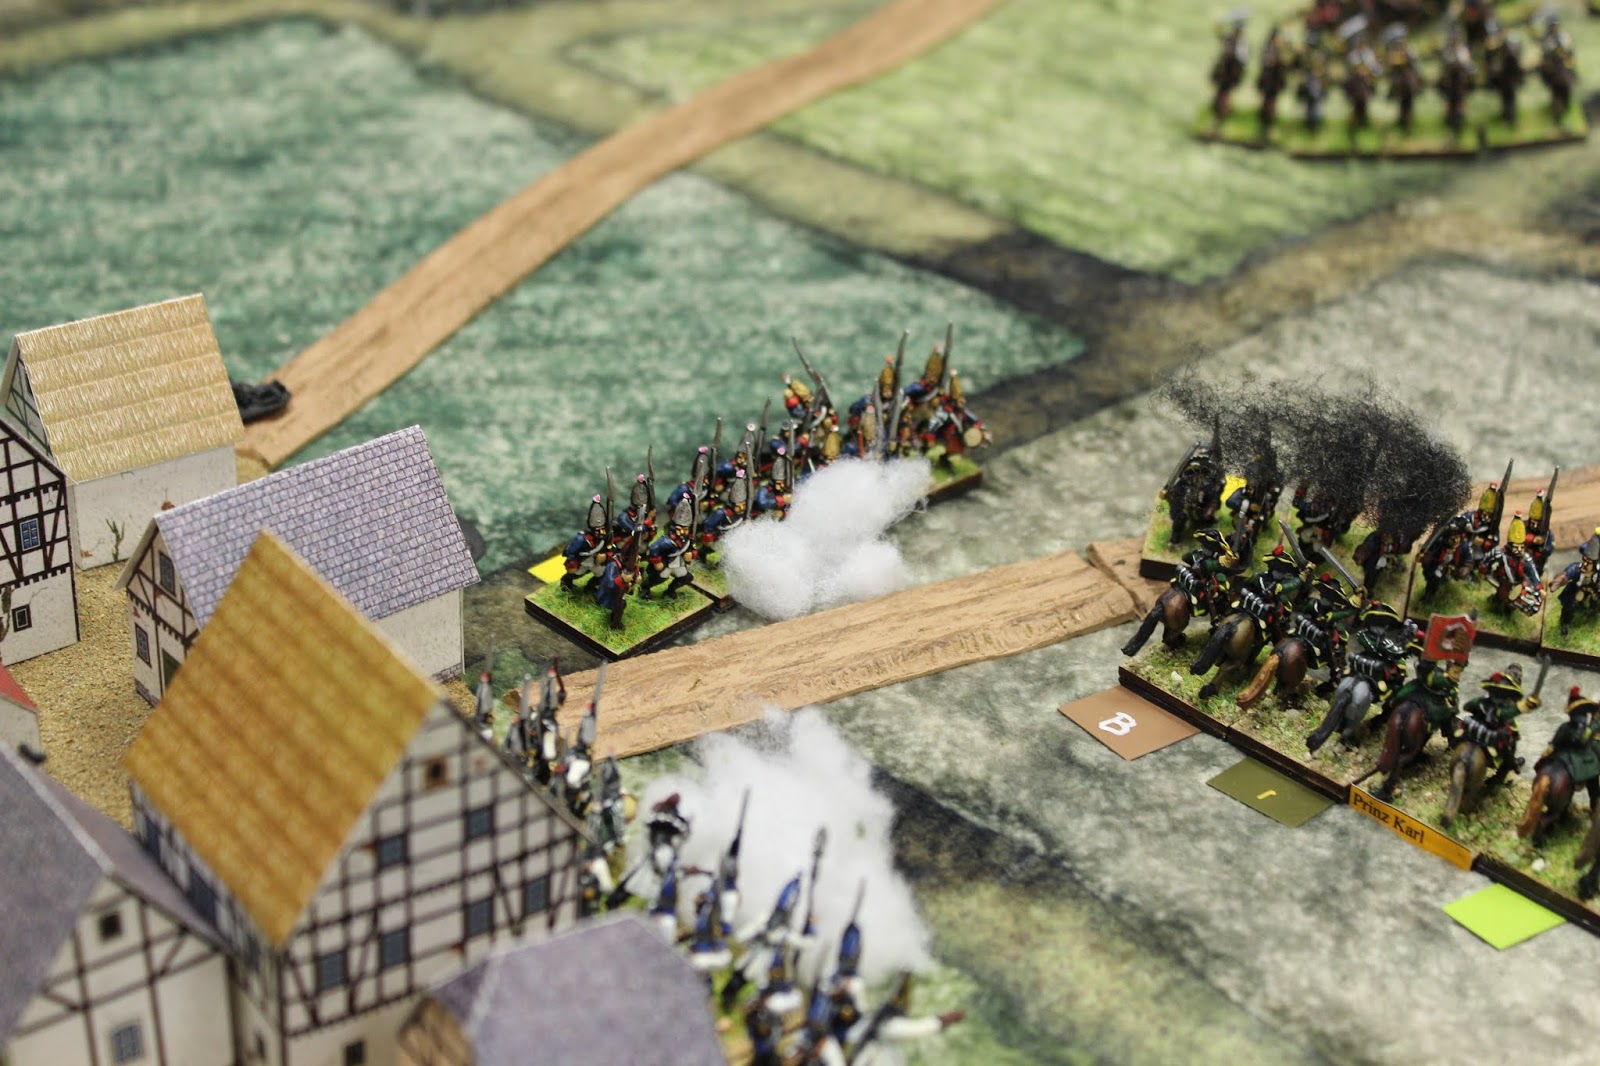
The Prussian 2nd Cuirassiers tangles with the Saxon Plotz and Prinz Karl regiments.

The Saxon 2nd line breaks through to attack the Prussian Dragoons.

Below you can see several routing Prussian cavalry regiments, with Prussian hussars on the left coming up in support. The Austro-Saxon cavalry is standing proud, but worn from their effort.


The Prussian Infantry Marches
With the Saxons getting the upper hand my spirits were raised that "hey, we have a chance", but then the Prussian infantry started moving in! In the WAS the Prussian Infantry have a +3 base die roll modifier, meaning they were going to be tough buggers in battle. Also, Brian managed to pull some excellent Army Characterization Cards at the beginning of the game: Extra Brilliant Leader card (he had one due to his skilled commander already!), All infantry UP1 on Morale (damn!), and an extra Artillery Reload card. Austro-Saxons only got an extra Opp Fire chip in their draw!
Here the first line of Prussian infantry advances on the Austrian on the far right of the Austro-Saxon army.

Mike maneuvered his Prussian Grenadiers around the Austro-Saxon left flank and was able to fire into the flank of the Saxon Grenadiers that were deployed just outside of Pilgramshain. This forced me to push my other Saxon Grenadier back into Pilgramshain, so they wouldn't get flank, but that severe reduced their firepower capability.

The Prussian second line of six Musketeer regiments advances in the center in column of march.

Brian's Prussian Grenadiers (yes, I had to use Fusilier figures as I ran out of Grenadier units for the Prussians) advance and trade volleys with the Garde zu Fuss of the Saxon brigade.

General firefight opens across the front.

View from the Prussian side, showing a Saxon infantry brigade in the background marching to the center of the battlefield.

The massive force of six Prussian Musketeers advances towards the Saxon center.

The Death Rattle of Austro-Saxon Army
This is where we started playing on night number #2.

View from the Prussian side of the remnants of the cavalry battle in the center.

The Prussian Grenadiers unleash their deadly volleys.

Mike pushes his Grenadiers to hit the Saxon cavalry. (His fire fails to harm them). Mike rolled really poorly for his unit qualities, then when he was fighting.
Saxon Leibgrenadiergarde advances in support of the main Saxon line!

Prussian Grenadier's fire forces the Saxon Garde zu Fuss to route after this!

The second round of the cavalry battle begins!

One of the better Saxon cavalry units routes by their commander, Weissenfels!

The Death of Winterfeldt! (red heart in top left) The Prussian right wing infantry command is mortally wounded, causing all six of his infantry to go out of command. Just when the Prussian cavalry was rallying to battle. This hurt how much pressure the Saxons on the left.

Prussian Hussars hitting the flank of the cavalry


Prussian 3rd Cuirassier smashes one Saxon infantry in column of march (not picture), then overruns and kills the Saxon brigade commander. Now they are poised to destroy the last line of Saxon resistance.


Austrian Cuirassier finally settle the matter by hitting the Prussian Cuirassier in the flank and they rout!

Bevern's Musketeers and the Austrian move in close and deliver point blank volleys!

Austro-Saxon army is out of morale chips by now, so they are slowly hurting the Prussians with their fire, but can't challenge them for morale failures.

The Saxon Leibgrenadiergarde is routed by Prussian Grenadiers.

The center is starting to crumble for the Austro-Saxons, but the Austrian cavalry routs another Prussian Cuirassier regiment.


Pyrrhic Victory
Although the Austro-Saxon army ran out of morale chips, they held out much longer than their historical counter-parts. Meaning that this part of the Prussian army was unable to turn and join into the second part of the battle against the main Austrian part of the Army closer to Hohenfriedberg.
I felt worn out after the game, in a good way. I has happy that the Austro-Saxon army held out despite the clear advantage in Prussian quality, leadership, morale chips, and sequence deck!
Next up is a Vauban's War playtest featuring mining!!!

Bibliography or Sources
Die Kriege Friedrichs des Grossen 1744-1745 T2 B2
Refighting History volume 6 - Charles Grant
Age of Honour (Fire and Fury Scenario book)