Good day folks!
I introduced 6 new players to TO THE STRONGEST over the weekend with my 18mm WoFun 2nd Punic Wars collection. We refought Trebia minus Elephants and Mago's ambush force. Roughly 10 units per side were missing. This was still a LARGE battle and was more than plenty for all the players involved. The mat is from Cigar Box and it is their Sicily mat with hand applied brown dots to make the 4" grid.
The game and rules were warmly received, and everybody wants to play again. This was my first stab at the Punic Wars and there are a lot more troop types and different special rules than my prior games of Greeks vs Persians. I think I have finally come up with a good rule for Roman line swapping as the ones that come with the rules I don't care for, including the Even Stronger version. (I'll likely blog about that)
I'll likely run this at Historicon 2025 too.
Because I was on the side of the battlefield, I don't have a lot of great "in action" photos. As usual, click for larger images and filmstrip style viewing (if you don't want to read the text)
Pre-battle deployment from Roman vantage point (four Roman\Latin legions):
Getting Ready
Well, I had the WoFun 18mm Punic War collection for a year or two now and wanted to up my game with some movement tray sabots and labels.
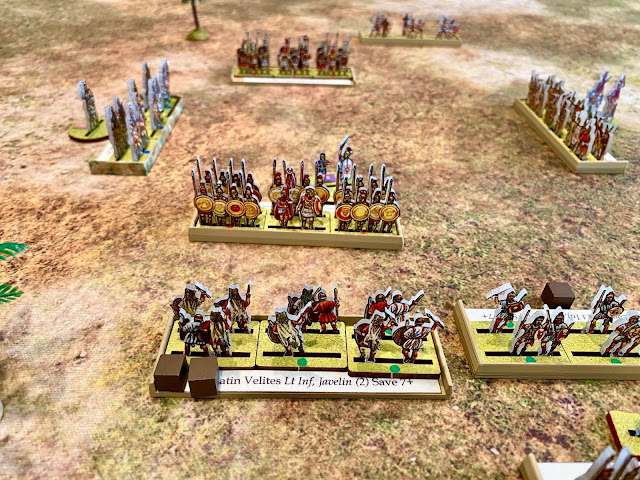
My friend helped make the correct size sabots for the 3 stand units (90mm wide x 20mm deep). It took several test runs to get the base sized to fit the three bases plus have room at the rear to put a nice large font label. We are getting older and need larger fonts these days. I added a color-coded boxed command group number so players could easily find and identify the commands.
The format is Command Group # (colorized), Nationality, unit type, TtS unit characteristics or weapons in italics. If it is a ranged weapon it would have (ammo) in parenthesis. Lastly the save value is listed. This labeling worked so well the players never referred to the rosters I gave them.
Here are some examples of the sabots and labels before the game.
Also, the Gauls were DEEP characteristic, so I have Steve make a base twice as deep as the others to give them that look I wanted.
To make the labels be reusable I used a special glue called Aleene's 29-2 Tack-It Over & Over Liquid Glue 4oz, Clear. Watch some of the customer videos on how they use it. Recommend the 24 hour drying period before attaching the tables to anything. Also, I laminated the labels and cut them out before applying the glue. I found glue drops worked better than a thin bead of glue.
Amazon Link to the glue: Amazon.com : Aleene's 29-2 Tack-It Over & Over Liquid Glue 4oz, Clear : General Purpose Glues : Arts, Crafts & Sewing
Lastly, I've been using Chits rather than card desks for Activation and Hits\Saves with To the Strongest. I think they look much better, especially with 15mm figures and 4" grid. Playing cards just dwarf the minis and take away from the atmosphere. I made 320 new chits in four different colors. I'll make two more sets and then I should never need to do this tedious task again. :-)
THE BATTLE
First, we will get an overview of the forces, and then I'll add some in game combat photos.
 |
| Center of the Carthaginian lines filled with Gallic Warriors. Brown cubes indicate unused Javelin ammo. After a unit fires the ammo is removed. |
 |
| Latin Legion on the left (Command Group 3) and Roman Legion (Command Group 1) on the right. Pilums indicate unused Pilums (Shock Missiles in TtS) |
 |
| On the right you can see Iberians and African Spearmen. Slingers on the far right have three ammo tokens. |
As mentioned, I was located at the end of the table so I couldn't take many in game photos. Here are a few showing the action mainly in the infantry commands.
 |
| Light units initiate the battle with mostly ineffective javelin fire. Here you can see my new chits in action. |
 |
| Latin Allied Legion pressing the left-wing African Spearmen and Iberians. |
 |
| This HEROIC Gallic Noble Warrior unit outlasted a half dozen attacks from the front and flanks by the Romans and eventually drove the Hastati and Principes back. They earned their laurels!! |
 |
| Latin Allies attempting to crush the Carthaginian left with frontal and flank attacks. |
 |
| Clash of swords and shields in the center. From the Gallic commander's perspective. |
 |
| Good view of the Carthaginian Iberian\Africa right center command. |
Here is the situation at the end of the battle. Another hour of gaming would have settled this.
 |
| View of the battle from Carthage perspective at the end of the day. |
At this point the Carthage forces were pushing hard in the center with most casualties among the true Roman legions (see below). What was unusual, was that both cavalry wings were won by the Romans even though they were heavily outnumbered. So, I believe the Carthaginians were about to really make things happen in the center. However, this could still go either way due to the flank situations.
Casualties
So, I took follow-up photos and reviewed the casualties from
the battle.
Each side lost 9 Victory Metals (Carthage started with 24 and Romans had 23)
Romans Casualties
- 3 x Hastati
- 1 x Principes
- 1 x Velites (Lights)
- 8 x Active units disordered
- 1 x African Spearmen
- 1 x Iberian Cavalry
- 1 x Libyan Lt Infantry
- 2 x Numidian Lt Cavalry
- 1 x Gallic Cavalry
- 4 x Active units disordered


