French Players: Jan, Phil, and Mike J.
Allied Players: Fred and Brian
Umpire: Eric
Rules: Piquet Cartouche 2nd Edition
Scale: 15mm
You can read about the battle on the Project SYW site
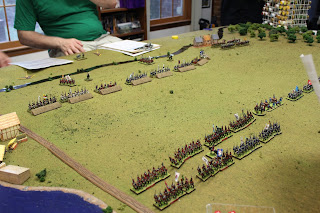
View from the French left flank. There are three ridges that cross the battlefield like fingers. They just effect LOS, and do not modify movement or combat results. The "entrenchments" are actually hastily made abatis walls. They are CLASS II cover for Piquet folks. Stream is CLASS II for moment. Town sections are CLASS II, while the woods on the left is CLASS III.
In this photo I have marked the 3 ridges, which are hard to see in photos due to my terrain. There is a small stream that flows behind the main French line. The town of Rosenthal is next to the main river.
On the far left flank of the French stand the pesky Volunteers de Clermont hoping to harass the Allied flank as they march by.
Good view of the entire battlefield from the Allied side.
These are Usborne models I made years ago. I love the water mill. I haven't finished the river terrain and the island cover.
Nice shot of the Hessian Mansbach Regiment
The Reichsarmee regiments take some solace in the abatis they are hiding behind.
The Allied plan was to push hard with the Hanoverians and Brunswickers on the left near Rosenthal, while the Hessians advanced to pin the French right. Combined Hanover\Brunswick assault on the left below.
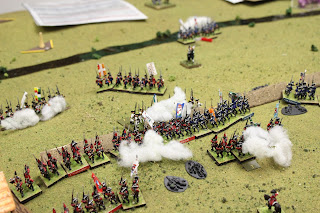
Good view of the infantry wing advancing on the French lines. Taking heavy fire from the French guns on their way in.
Mike advances his French cavalry to threaten the Hessians
The next two photos show the Hanover wing hitting the French lines, just before opp fire was taken by the French.
One Hanoverian Grenadier battalion was destroyed (it was in the gap to the right of the Grenadiers pictured below) and another infantry unit lost 3 of 4 stands to French infantry and artillery fire. Morale was low among the Allied players.
The French infantry and Grenadiers go toe to toe with point blank fire. Eventually the Grenadiers got the upper hand and routed the French regiment.
Hanoverian infantry inflicting horrible casualties on the French guns (underneath the smoke!)
One Hanoverian and one Brunswick regiment attack the lone remaining French regiment to their front and drive them back. Swiss regiments are being pushed into the fray by the French.
On the left, the Hanoverians push the French out of the abatis.
Meanwhile on the Allied right flank Brian finally launches his assault against the French in echelon, with the cavalry brigade in reserve.
This poor Hessian unit was tasked with taking out the Volunteers de Clermont from their wooden hideaway, but were stopped dead in their tracks by accurate fire. This Hessian unit would be stuck here the rest of the game.
Hessians attack the French and slowly take some casualties from musket fire, but can't seem to dislodge the French behind the abatis.
French guns forgot to bring dry powder. Shot after shot misses the advancing Hessians. Phil was rolling D10s and missed nearly every shot and never actually inflicted a stand loss. The Hessian assault, plus the dire situation, forced the French to abandon the abatis.
The view of the overwhelming Hanoverian attack from the French position. Notice all the casualty figures laying around the abatis.
The French, hoping to stem the tide of the Hessian advance, move their cavalry into position to attack the flank of the Hessians close to the abatis. This aggressive move will be short lived.
Too late, the French pull their units out of the woods in a desperate attempt to force the Hessians to turn from their attack. Here is the Alsace Regiment trudging through the thick woods.
Reichsarmee infantry gets flanked by the Brunswickers and are routed (3 stands lost).
Hessian Garde Regiment advances on the flank of the French dragoons and destroy them with volley fire!
Hessian Grenadiers, just before the advanced and destroyed the Hollenzollern Cuirassier (in white to the right). This effectively ended the battle as the French started giving the Allies morale chips.
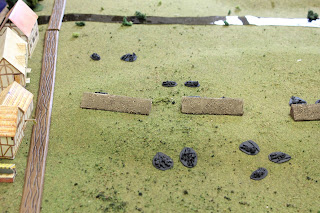
I use black casualty figures to show where each stand was lost in the battle. I find it looks cool and when the figures are cleaned off the table you can see where all the action took place. Eventually I'll paint these casualties, but not until my collection is done. Let me know if you like them. Here are photos looking left to right from the Allied side of the table.
Here is where the Hanoverians attacked.
In the middle where the Reichsarmee took a pounding
Right side of the abattis near the end of the battle
Far right were the French cavalry was destroyed. (there are four more French cavalry casualty figures just to the left of this photo) The French lost over 50% of their cavalry's combat effectiveness!
Overview from the French left flank looking back towards Reichenberg.
We had a great time with this alternative history, and we are continuing with the SYW in the coming weeks, but we will have the Prussians and Austrians on the table! Tally Ho!


Looks great! Your 15mm troops are superb, Eric.
ReplyDeleteInteresting read, your banner image now has peeked my interest in another period :)
ReplyDeleteThanks Peter! Hi Jacko, glad your interest is peeked! Please take a look around at the battle reports from the Russo-Turkish wars of the 1790s. :-)
ReplyDeleteExcellent Battle photos and write up - looks superb and the action played out well. Are your 15mm from Old Glory- Eric? Regards. KEV.
ReplyDeleteSuper looking game. What version of Initiative did you use ?
ReplyDeleteI always use the rule of 1/3.
ReplyDeleteLooks great! Your 15mm troops are superb, Eric.
ReplyDeletegoldenslot
บาคาร่า online