As promised, here is the "how I painted my new fort" blog post.
Prior post: Din of Battle: 3D Printed Roman Marching Fort from CentrionStudio on Etsy
Direct link to CentrionStudio (they have a TON of other buildings and periods so if you are not into Romans, you can choose from a huge variety of terrain)
As usual, click on photos for larger views.
Tools
- Paint brush that is large and can spread liquid well. Another for dry brushing and one last one for detailed painting.
- Hardware File(s)
- Exacto knife
- Stedi Nippers - great for trimming flash and residue from models
- Spray Paint - Krylon Camouflage Paint, Ultra Flat, Sand color, 11 oz. - K04295000 (took the entire can of paint to cover the entire fort)
- Citadel Colour Shade (Agrax Earthshade)
One bottle got me through the entire process.
Prepping the Fort
First, wash in warm water and use a soft brush to "scrub" lightly the pieces to remove any residue.
Use nippers, exacto, and file to remove as much extra flash\filament as possible.
In addition, I snipped the tops of logs off the models so that I could fit my WoFun (30mm x 20mm) bases on the fort walkways. (Prior post discussed this).
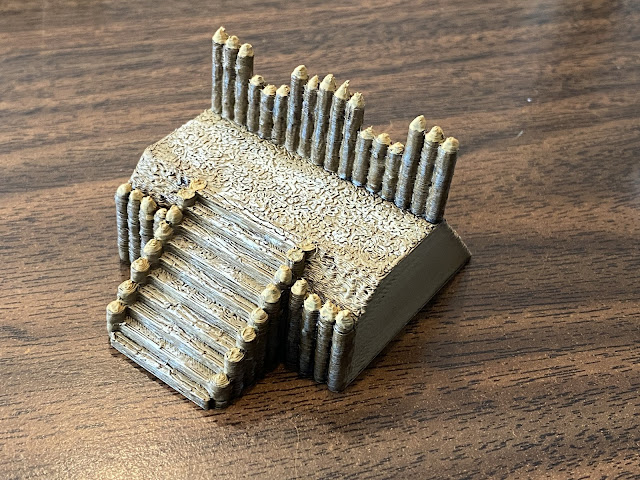
I wanted to have the weapon's platform section have no log "tops" so that it was flat for whatever size weapon stand I put on it. I like how it turned out.
Before (just primed with spray paint)
After (log tops removed so the platform is flat)
I also snipped the middle poll support for the large entrance, as I wasn't able to put a stand in the tower section without removing it. Glad I did that before I glued on the top tower section.
Lastly, I primed the entire model\sections with the Sand color spray paint. This allows the Shade to be washed on and pop out the details. You can see the grey un-primed tower parts to the top right.
Painting\Washing
I have never used the Shade from Citadel before but had bought it about a year ago to edge my WoFun figures, which I never got around to do. So, this was my first experiment and I LOVED using this product.
I did one wash across the entire set.
Then I did a second wash on just the logs and wood poles, doors, and towers. This turned out perfect as I was struggling to find a color I would like for the logs. This photo gives you an idea of the color process.
Adding Paint Details
At this point, the fort is completely usable, but I wanted to cap each cut log with lighter shades of tan\brown and dry brush some worn paths on the battlements and towers. This also allowed me to go back and snip out the fibers that I missed in the first go around.
For the cut log color, I used FolkArt 419 "Teddy Bear Tan" as the color. It pops well, especially when dried. For the tread worn paths I dry-brushed with Americana "Antique White". I like how it turned out.
Lastly, I dry brushed a neutral grey (American Neutral Grey) to blend in the logs and add more contrast then used Krylon Matte Finish to coat the fortress.
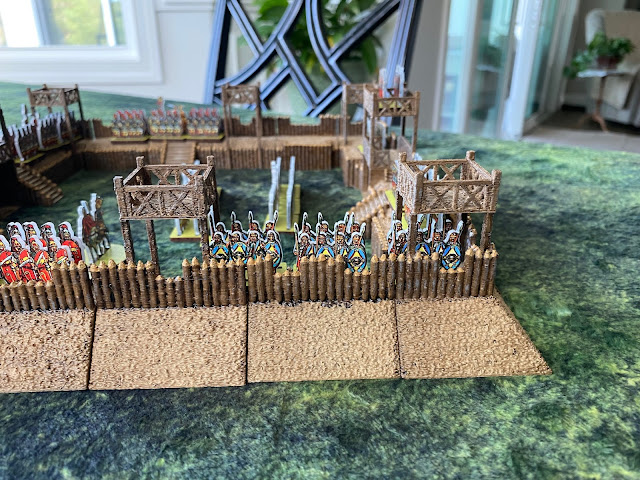
Finished product with Legions and Gallic Warriors
Here is the final product with the Romans manning the fort while the nasty Gauls are thundering around the outside ready for their assault! I chose to only add one tower to the corner sections instead of two levels high. This is because my fort will be used for battles rather than skirmishes and allows me to store it all in one box easier.
I have tiny rare earth magnets arriving soon which I intend to embed into each section, so they snap together and hopefully stay together during game play.
Now I need a Gallic Hill fort, and villages. I have an idea for villages, but still searching for a good Hill fort in 15mm. May just have to make one as they are quite simple in design.
Have a fantastic day!
Eric
PS - A little inspiration arrived this week too! The Landmark Julius Caesar which I didn't even know existed until last week!


Superb finished product, really like the model fort, it's a cracker, the painting is nice and simple but really effective and the finished product populated just looks brilliant.
ReplyDeleteThe fort looks super, Eric, and it looks like it should work great with your Wofun figures!
ReplyDeletevery cool
ReplyDelete