Hi folks,
Long time no blog posts! Sorry about that. Mainly playing board games (lots of them) which doesn't really work for blog posts.
Our North Africa Campaign (Operation Battle Axe) is rolling along nicely, and we have had several battles.
EC, the campaign umpire, gave me permission to post this AAR regarding the most recent battle: Battle of Point 205 which is the sixth engagement of this campaign. 10mm figures and Blitzkrieg Commander 4th edition rules.
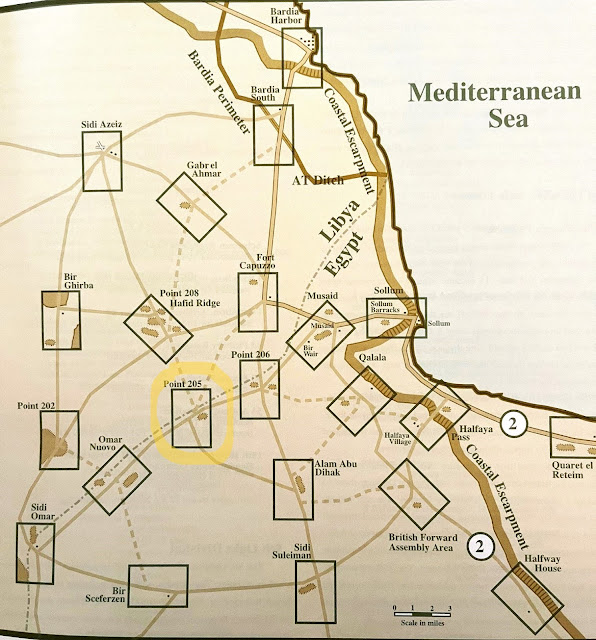
Map for reference:
The desert morning got lively during the recent battle at
Point 205. Charles’ 2nd RTR bumped into Hammer’s 1st
Battalion 8th Panzer Regt. (15th Pz. Div.) in a meeting
engagement. Neither side had FO’s present, so there was no artillery
support, just a clash of armor. Mac filled in for Hammer, as the latter
is currently riding a horse (with a name) somewhere out in the desert.
For context, the 1st Battalion 8th Panzer had all 3 companies present on the battlefield, consisting of 1 medium company (2 Panzer IV’s and 1 Panzer II), and two light companies (3 Panzer III’s and 2 Panzer II’s combined). Two Panzer III’s had been knocked at Musaid by Phil’s Matildas, and only one had been repaired. This was the 3rd engagement for two of the companies, having previously fought at Capuzzo (where they drove back Wes’ 6th RTR), and Musaid (where they were driven back by Phil’s 7th RTR). An impressive battle record for a 24 hour time period. Conversely, Charles’ 2nd RTR was making its first appearance in the campaign. 2nd RTR began the battle with 2 squadrons of A13 cruisers on the field (3 tanks each), supported by an A13 close support tank platoon. A third company consisting of older A10 cruisers made its way onto the battlefield near the end of the battle - more on that later. All in all, the sides were evenly matched in terms of tanks, with the Axis having higher command values.
0600 - Both sides entered the battlefield. 1st Batt. 8th Panzer quickly approached the frontier “wire”, while the Commonwealth made slower progress - in part thanks to a command blunder. There wasn’t much terrain on the battlefield, which emphasized the importance of mutually supporting units with clear fields of fire.
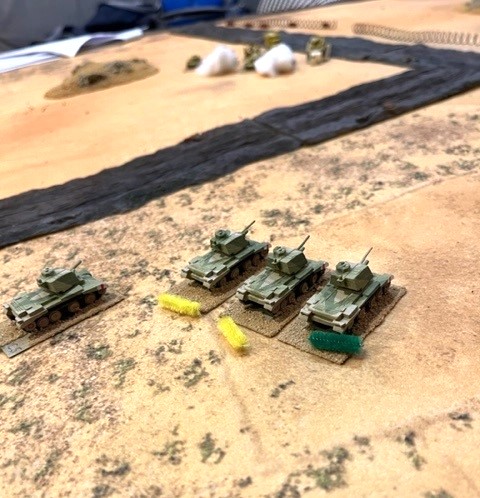
Above: the hardworking tanks of 1st Battalion, 8th
Panzer Regt.
Above: 2nd RTR moves onto the battlefield.
Above: Initial dispositions of the opposing forces. Germans at the top of photo
0630. The Axis moves quickly, and a full-strength light company moves up to a gap in the wire near the center of the battlefield. hill
Meanwhile, the remaining two companies move toward the west side of the board and prepare to create gaps in the frontier wire. Note that the frontier wire was strung on steel posts embedded in concrete, so tanks were allowed to create a 5cm gap by expending 10cm of movement.
The Commonwealth moves forward in two groups, the most westward of which is supported by the Close Support platoon (which fires smoke rounds through a turret-mounted howitzer).

The other A13 squadron stays to the east of the other
platoon and ultimately anchors its flank on a hill. This protects their
flank, but also restricts their line of sight. This would have important
consequences during the battle.
The above shows deployments around 7 am.
0700. Both sides are now in range, and the DAK light tank platoon in the center opens fire on the only British tanks not obscured by the hill. They manage to disrupt one cruiser, but the results are disappointing. The Panzer II attached to this company decides to dash forward to close the range for its 20mm main gun (I know), but is quickly disrupted by opportunity fire. Meanwhile, the British cruisers disrupt a Panzer IV in the western Axis detachment and successfully lay smoke in front of 2 Panzer III’s. The Panzer IV would have been destroyed but for some timely saves. At this point, it is a closely fought battle. However, Charles fails a command roll and is unable to move his eastern company from behind the hill into a more advantageous position. Thus, one A13 company is bearing the brunt of the battle.

0730. Alas for the Commonwealth, this state of affairs was short-lived. Mac goes on a heater and rolls an amazing series of successful orders for his central company, including TWO snake-eyes. I have never seen the like. Predictably, Cruiser tanks begin to go up in flames.

Yet more hits on the Brits.

After the shelling from the center company, Mac successfully moves his western detachment around the British flank to destroy another tank in the center. He also begins to engage the eastern British company.

0800. At this point, the remaining company of 2nd RTR arrives on the field. They take one look at the scene before them and immediately roll a blunder. They turn around and begin rolling towards their starting point.
The staggered British lose a total of 6 tanks from their
initial force. The seventh pops some smoke and manages to escape along
the track to Point 206.

The Axis hold the field as British cruiser tanks blaze.
Although they suffered several disruptions, the DAK suffer no losses during this meeting engagement. Mac fought an excellent battle, with mutually supporting units and good target selection. And great dice rolls (although he more than once failed to score hits - so victory was due to a lot more than good dice). Both commanders fought well. The only mistake Charles made was placing one of his companies’ too far away, and this was only revealed to be a mistake in hindsight. He was also frustrated in his efforts to move the company by poor command rolls. This battle could have turned out very differently.
NEXT BATTLES: It is now 0800 hours in the campaign. There are TWO battles to be resolved:
1) A large Commonwealth force attacks Sollum along the coastal road
2) A German Kampfgruppe runs into a Commonwealth blocking force at Bir Sceferzen (Ben and Charles).
Hope you enjoyed the post!
Eric


Nice battle AAR, nice kit - very in tune with my interests too!
ReplyDeleteGlad you enjoyed it! It is a truly fun campaign.
DeleteYet another set of WWII rules for me to look at ;) Thanks
ReplyDeleteHahaha! It is on Wargame Vault if you want to sample the PDF before you buy a hard copy
DeleteNice to see the old Command Decision campaign map in play.
ReplyDeleteNeil
Good eye Neil!
DeleteGreat looking game. BKC is a rule set I have not gotten to table much. Also board game posts are perfectly fine especially as some rather photogenic games out there now.
ReplyDeleteI do some shots of board games, but I don't like doing AAR for board games. I do have some lengthy Here I Stand game reports.
DeleteThanks, enjoyed seeing the campaign set-up Vs the individual battle. I do boardgames as well and do blog about them, but it does divide the audience between figure and boardgame posts, so most of thos that read my blog probably only like half of it 🙂
ReplyDelete